Automated Voice Cloning using Auto Dubbing
Este conteúdo não está disponível em sua língua ainda.
Braiv’s AI Voice Cloning allows you to translate your video into other languages while preserving the original speaker’s unique voice, tone, and delivery. With Auto-Dubbing, the entire translation and voice cloning process is completely automated, giving you ultra-realistic global voiceovers in moments.
Note: Auto-Dubbing is a hands-off, fully automated dubbing process. Translated transcripts are generated directly by the AI engine and cannot be manually edited after they are completed. For customizable dubbing workflows with editable transcripts, see our guide on Custom Dubbing.
Here is the step-by-step workflow:
1. Start by Uploading Your Video
Section titled “1. Start by Uploading Your Video”- Log in to your Braiv account dashboard.
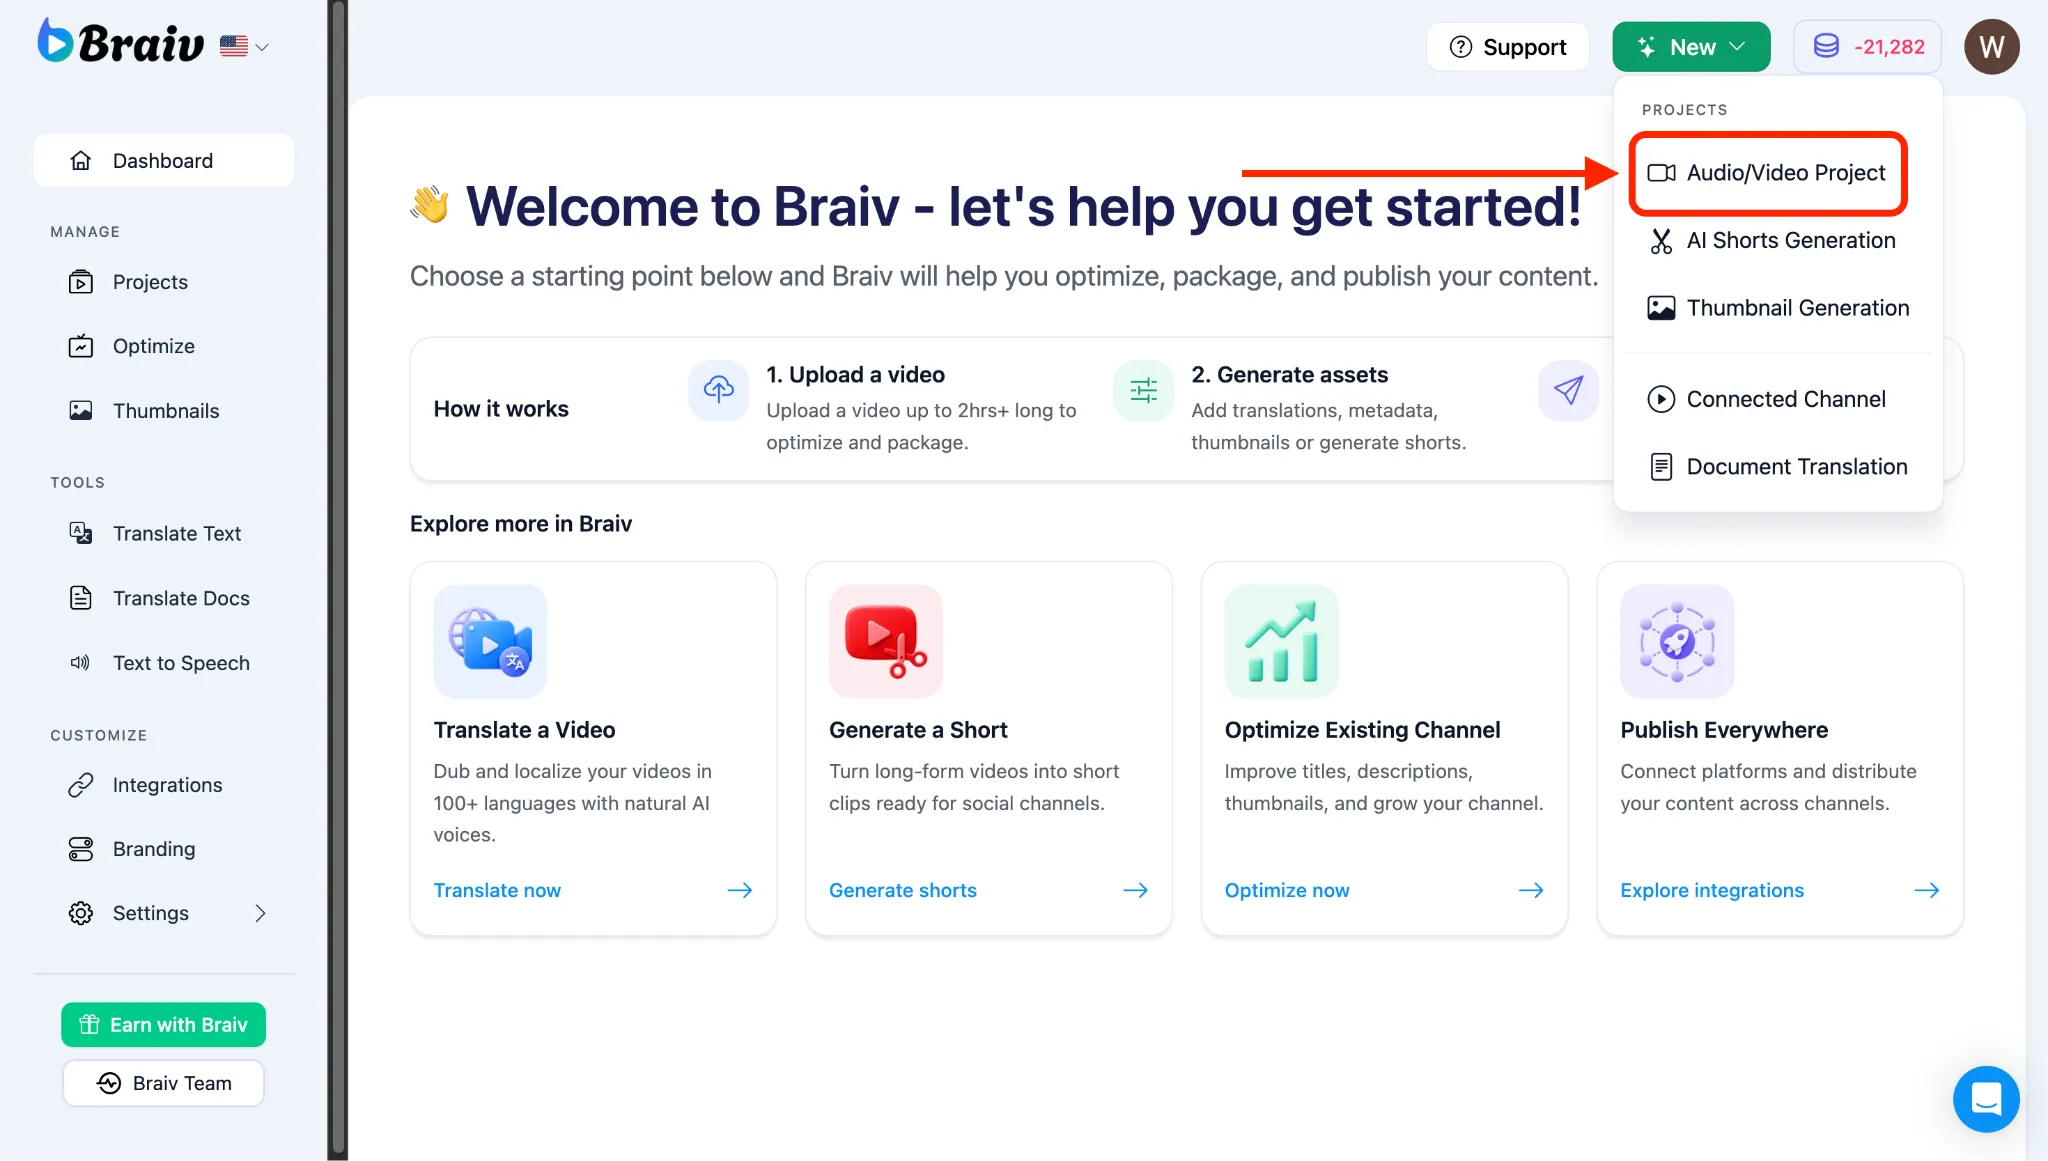
- In the top-right corner of the screen, click on the NEW button.
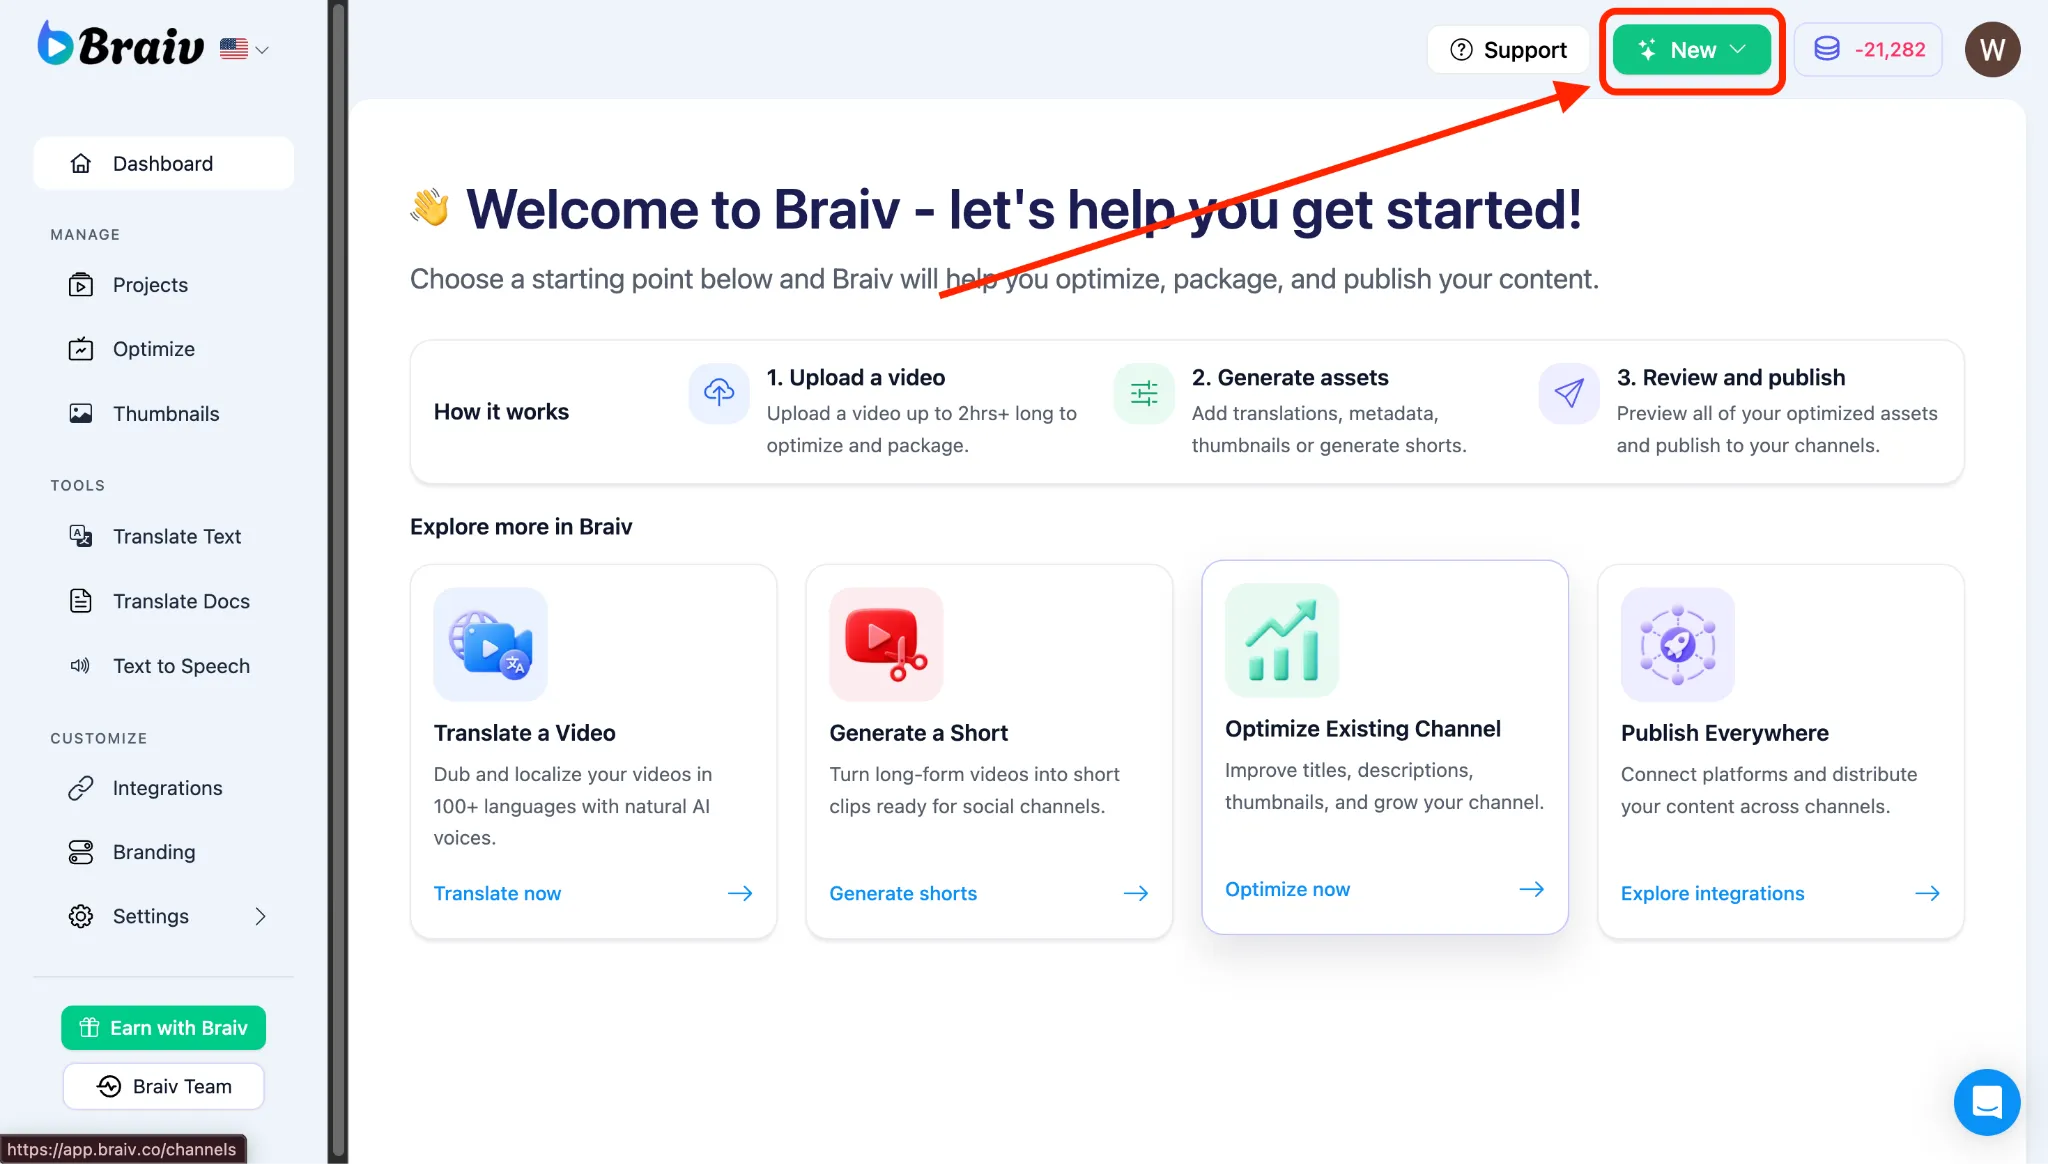
- A menu will appear, choose Audio/Video Project.
2. Select Your Video File
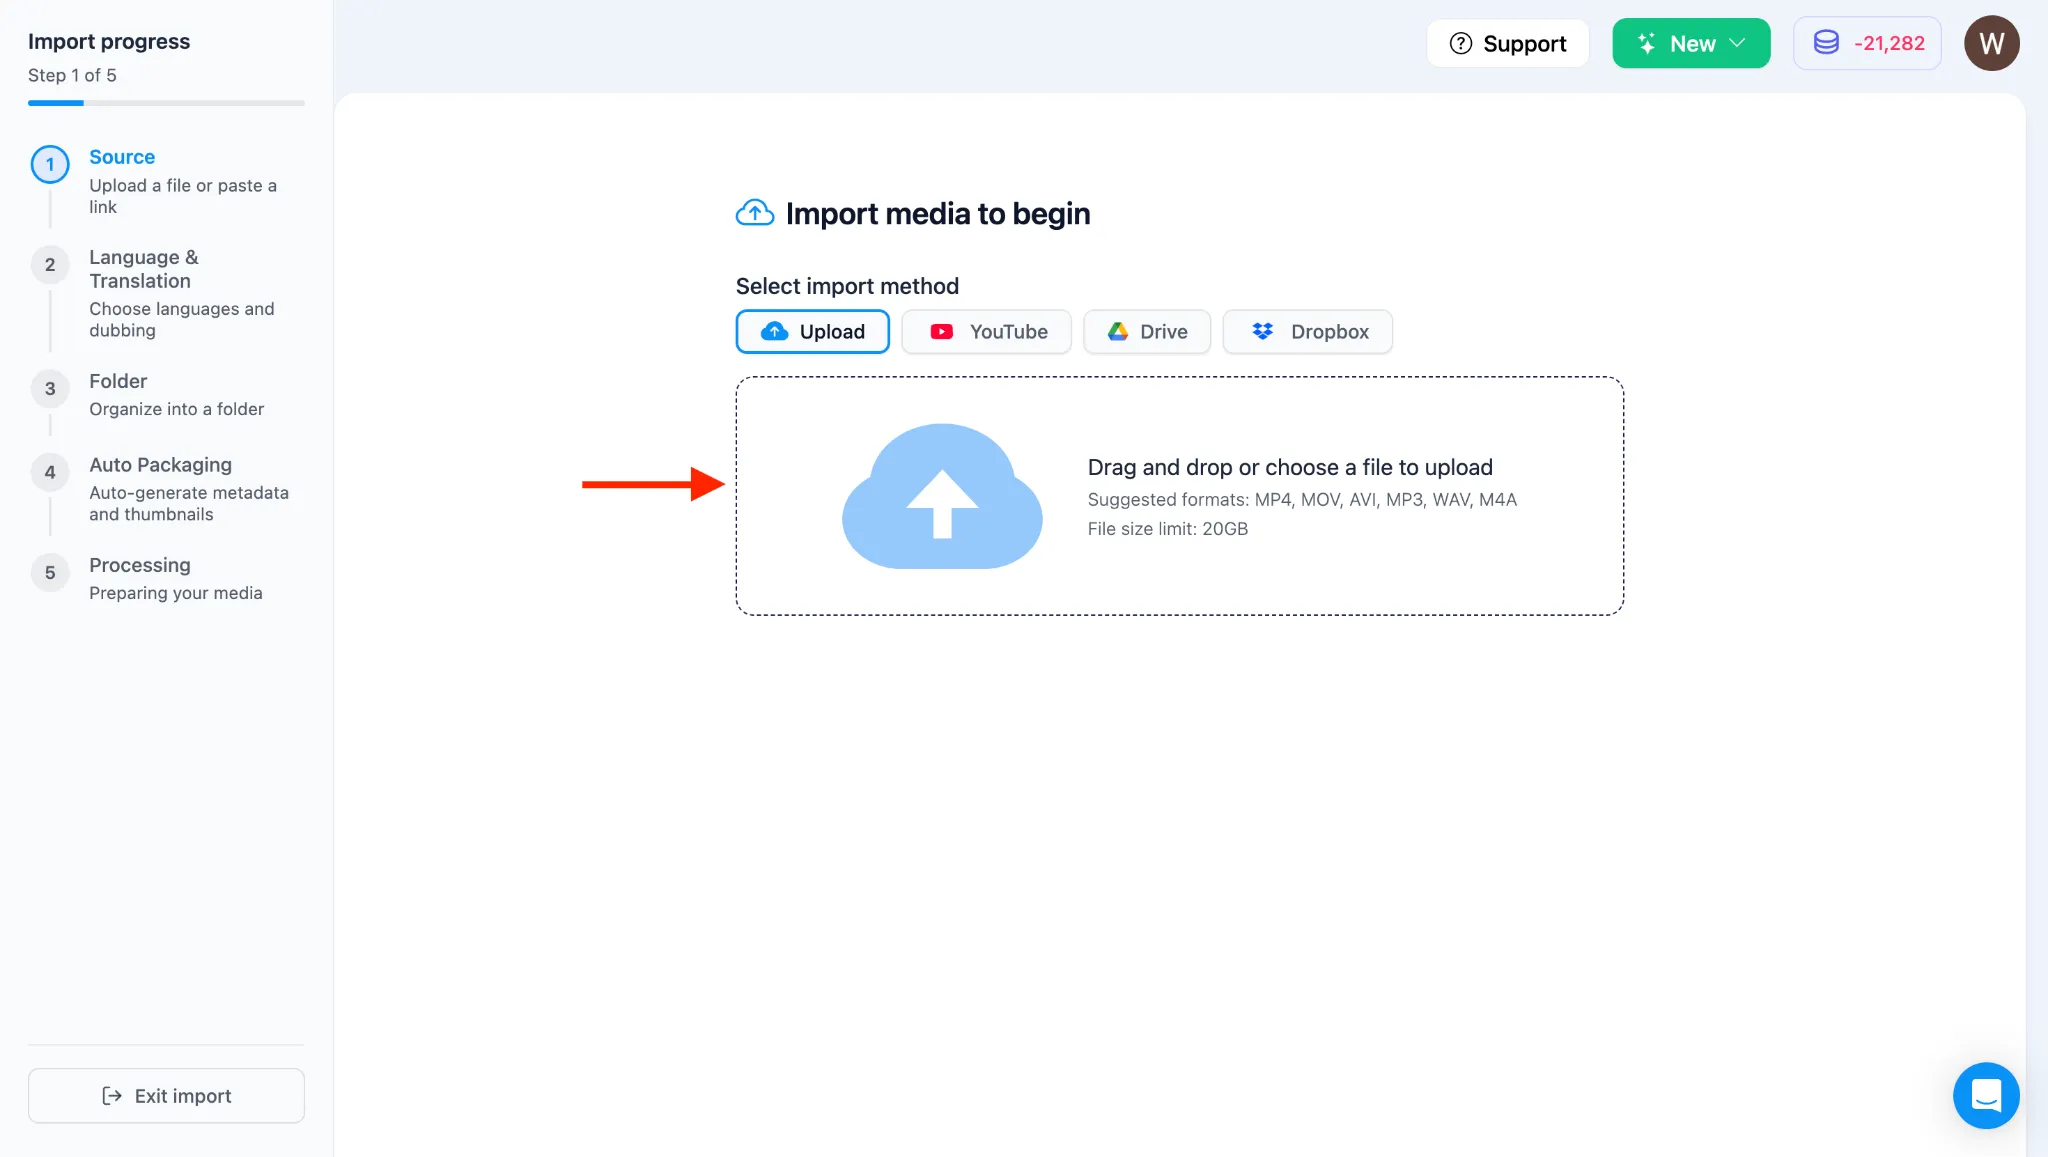
Section titled “2. Select Your Video File”- You will be taken to the Import page with four Upload options: Upload (computer), YouTube, Google Drive, and Dropbox.
- The system is selected to Upload by default. For this tutorial, we are going to upload from a computer.
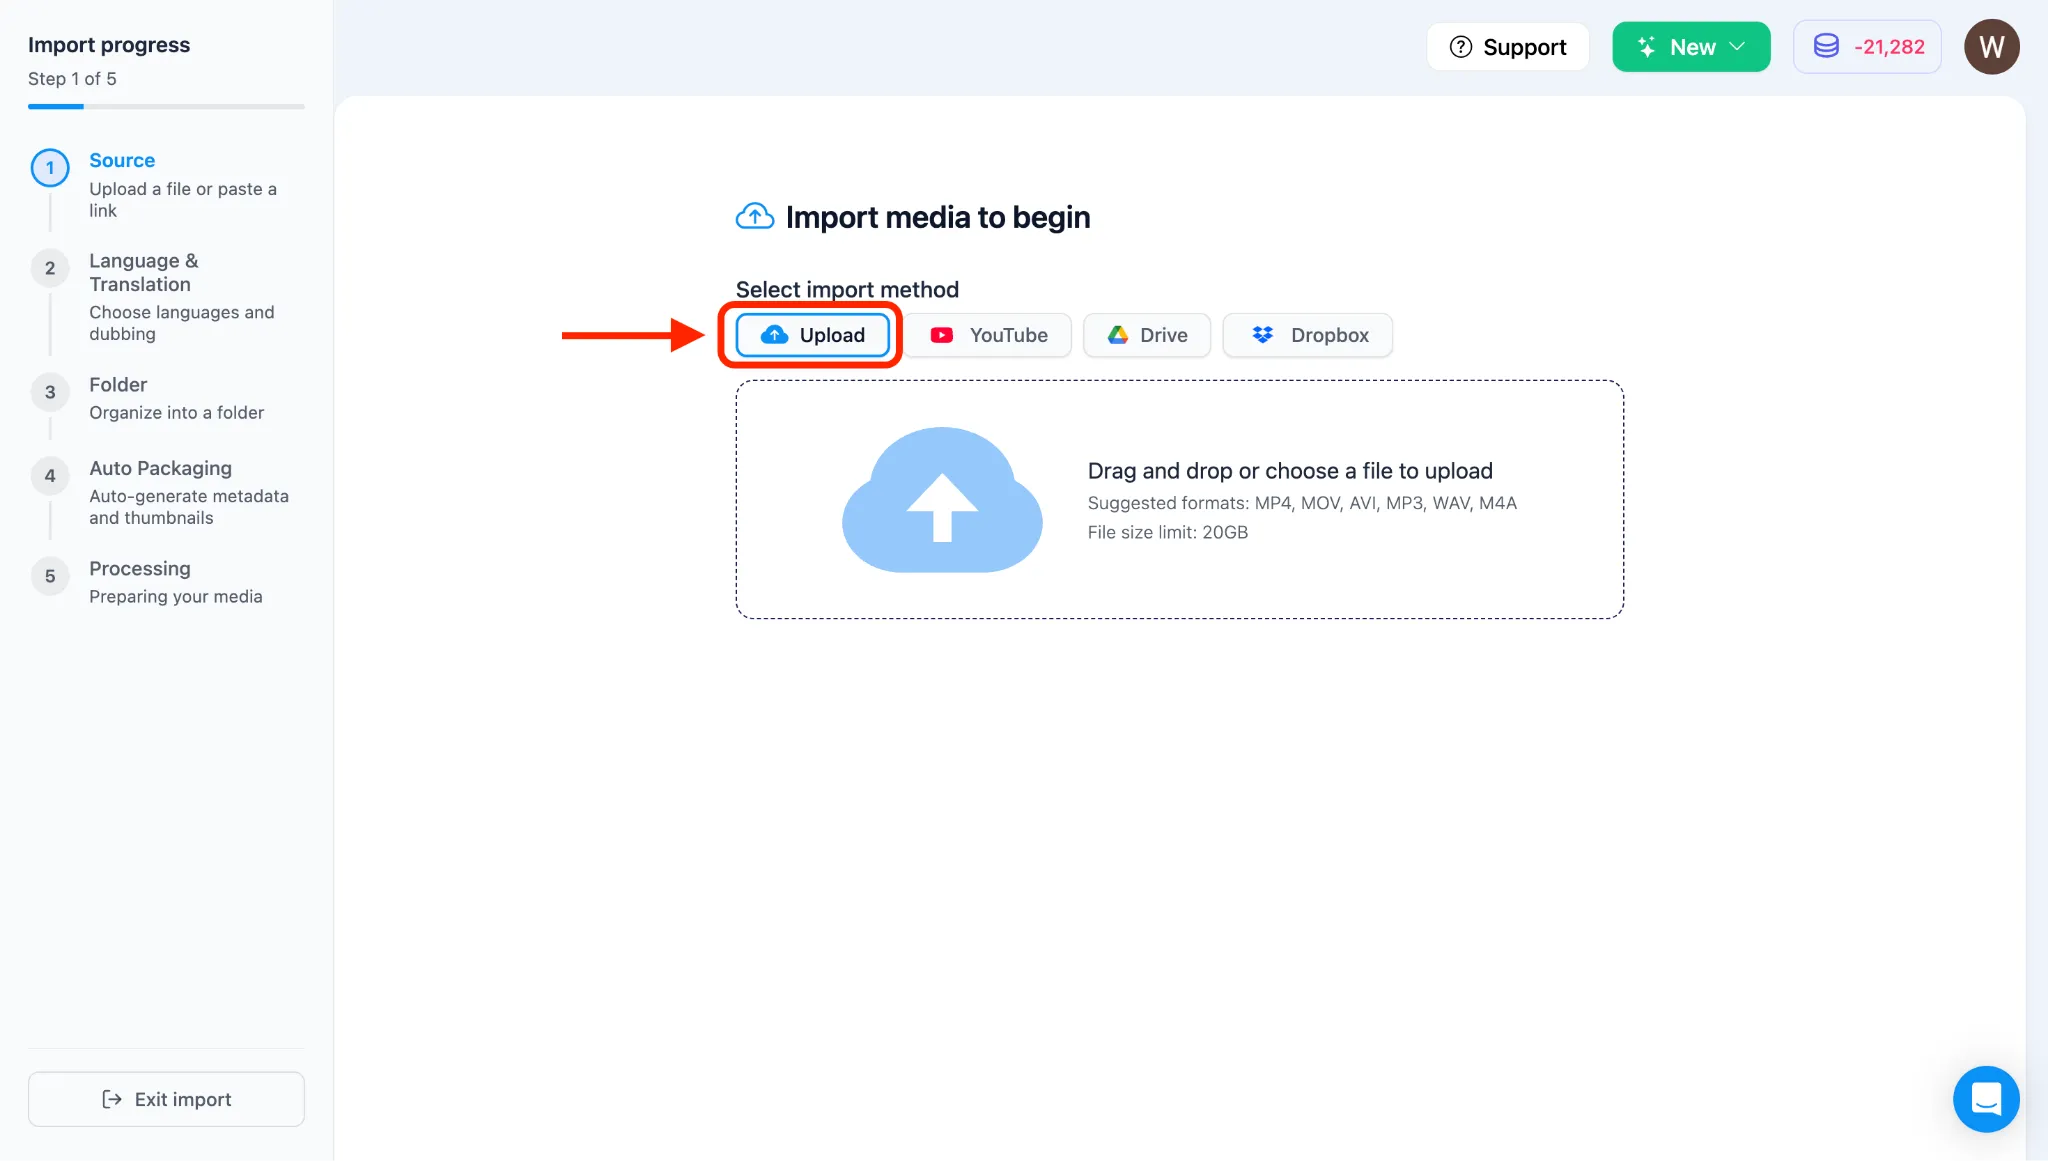
- Click inside the dashed upload box (where it says “Drag and drop video files here”) to open your computer’s File Manager.
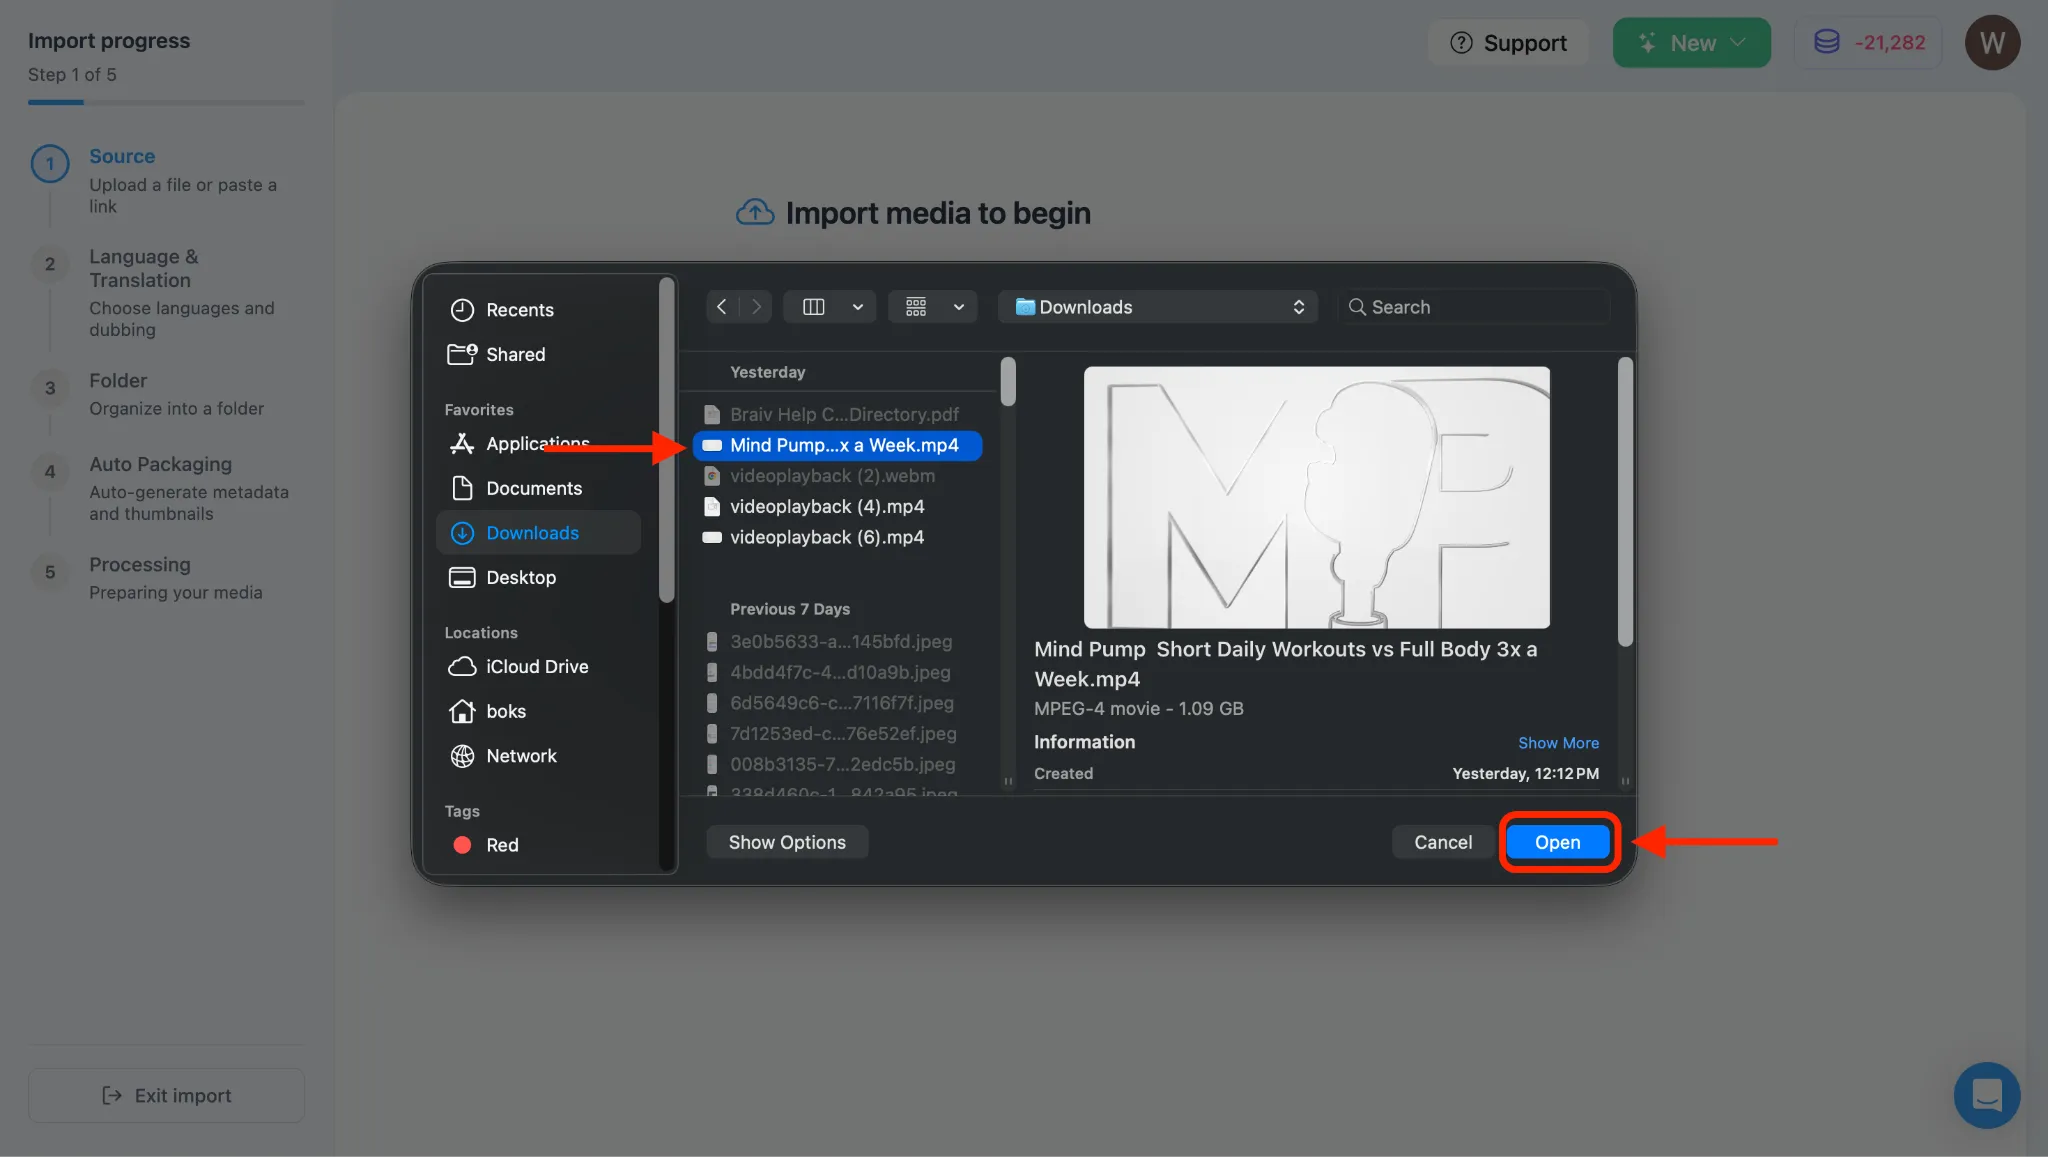
- Select the video file you want to upload from your local directory and click Open or Choose.
3. Verify Video Metadata and Import
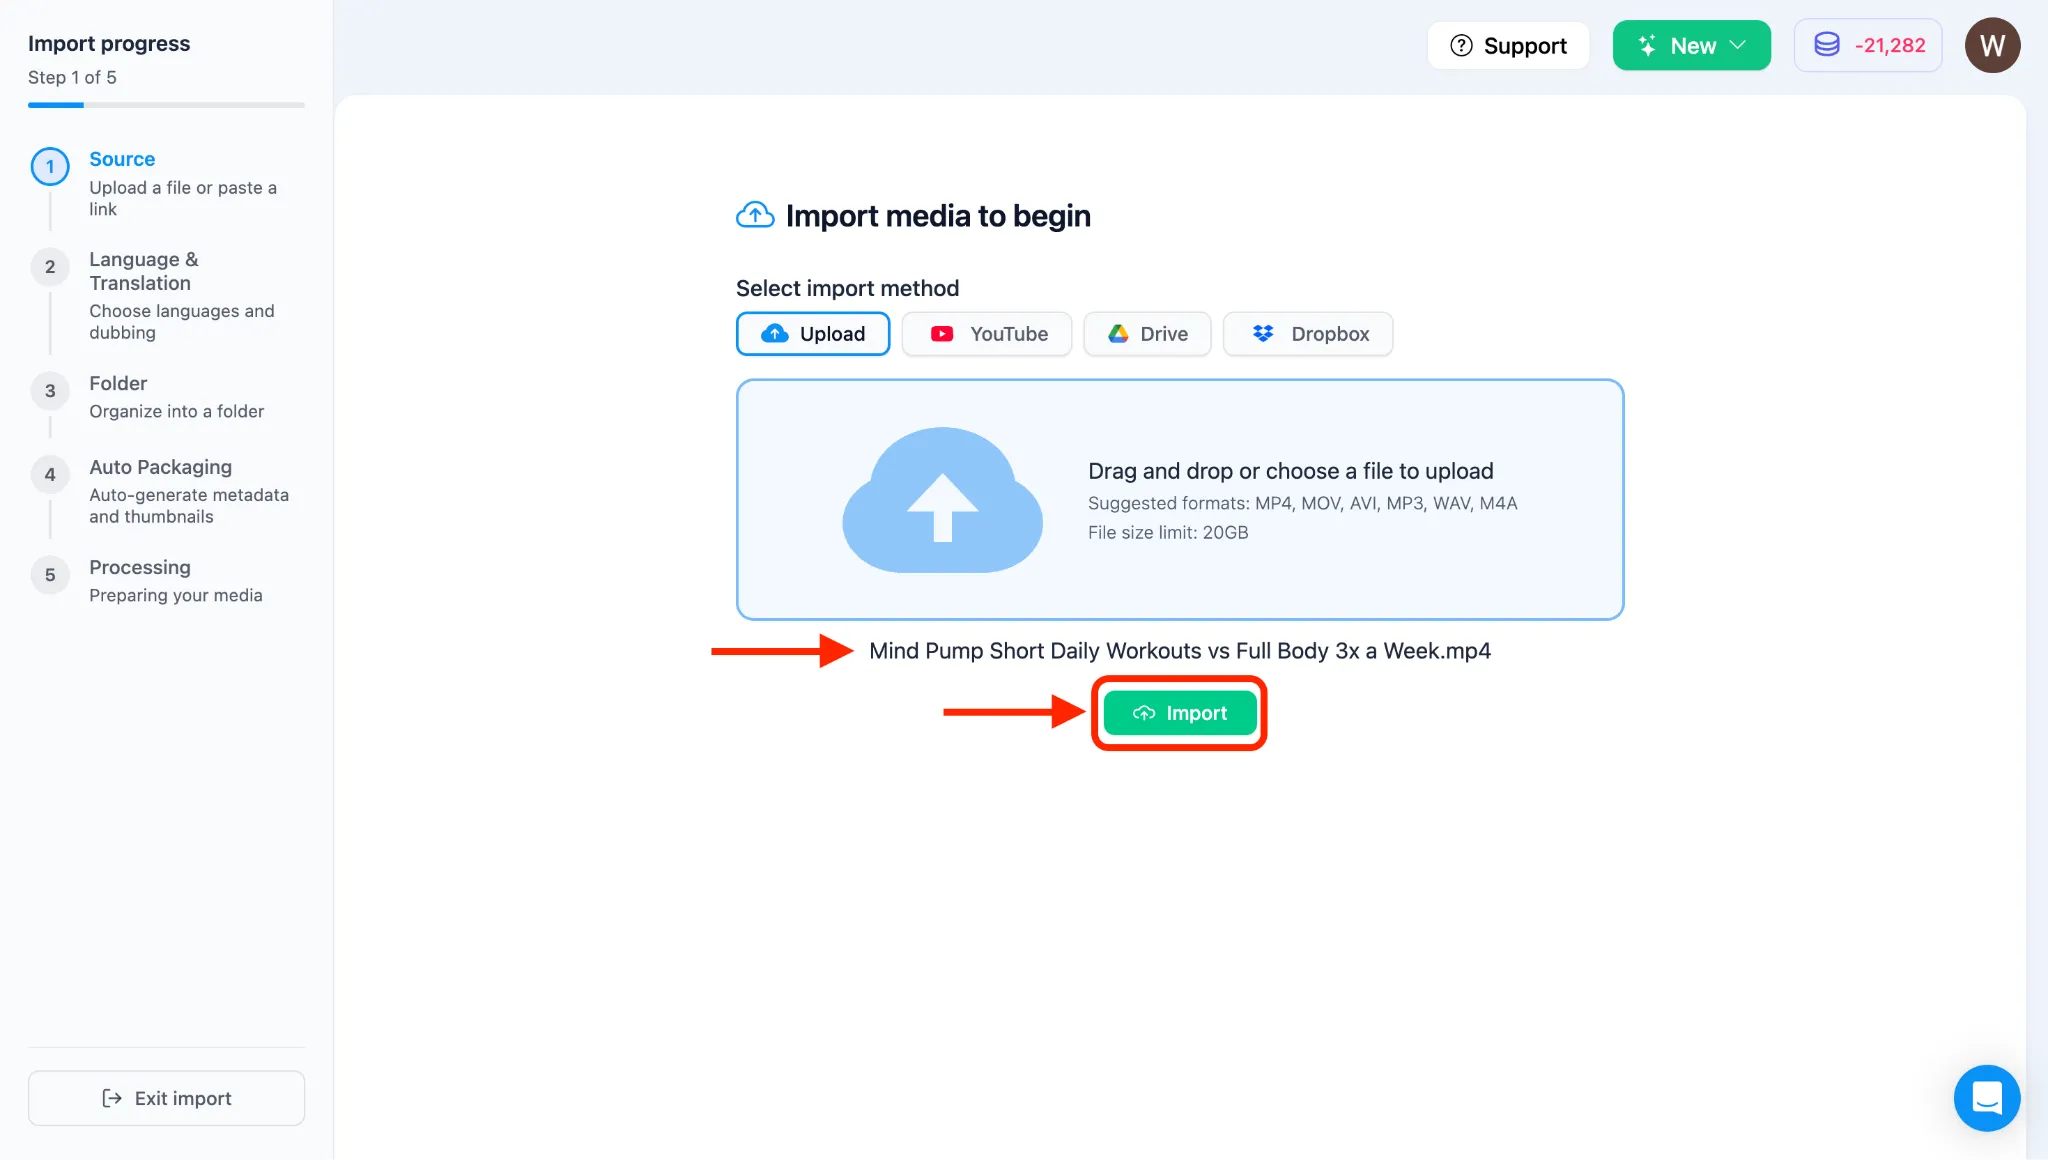
Section titled “3. Verify Video Metadata and Import”- After selecting the file, you will see its filename displayed inside Braiv.
- Wait a few seconds for the video metadata to load completely.
- Once the video details load, click the IMPORT button. (If the button is temporarily unresponsive, wait a moment longer and click again).
4. Select the Voice Cloning (Auto-Dubbing) Option
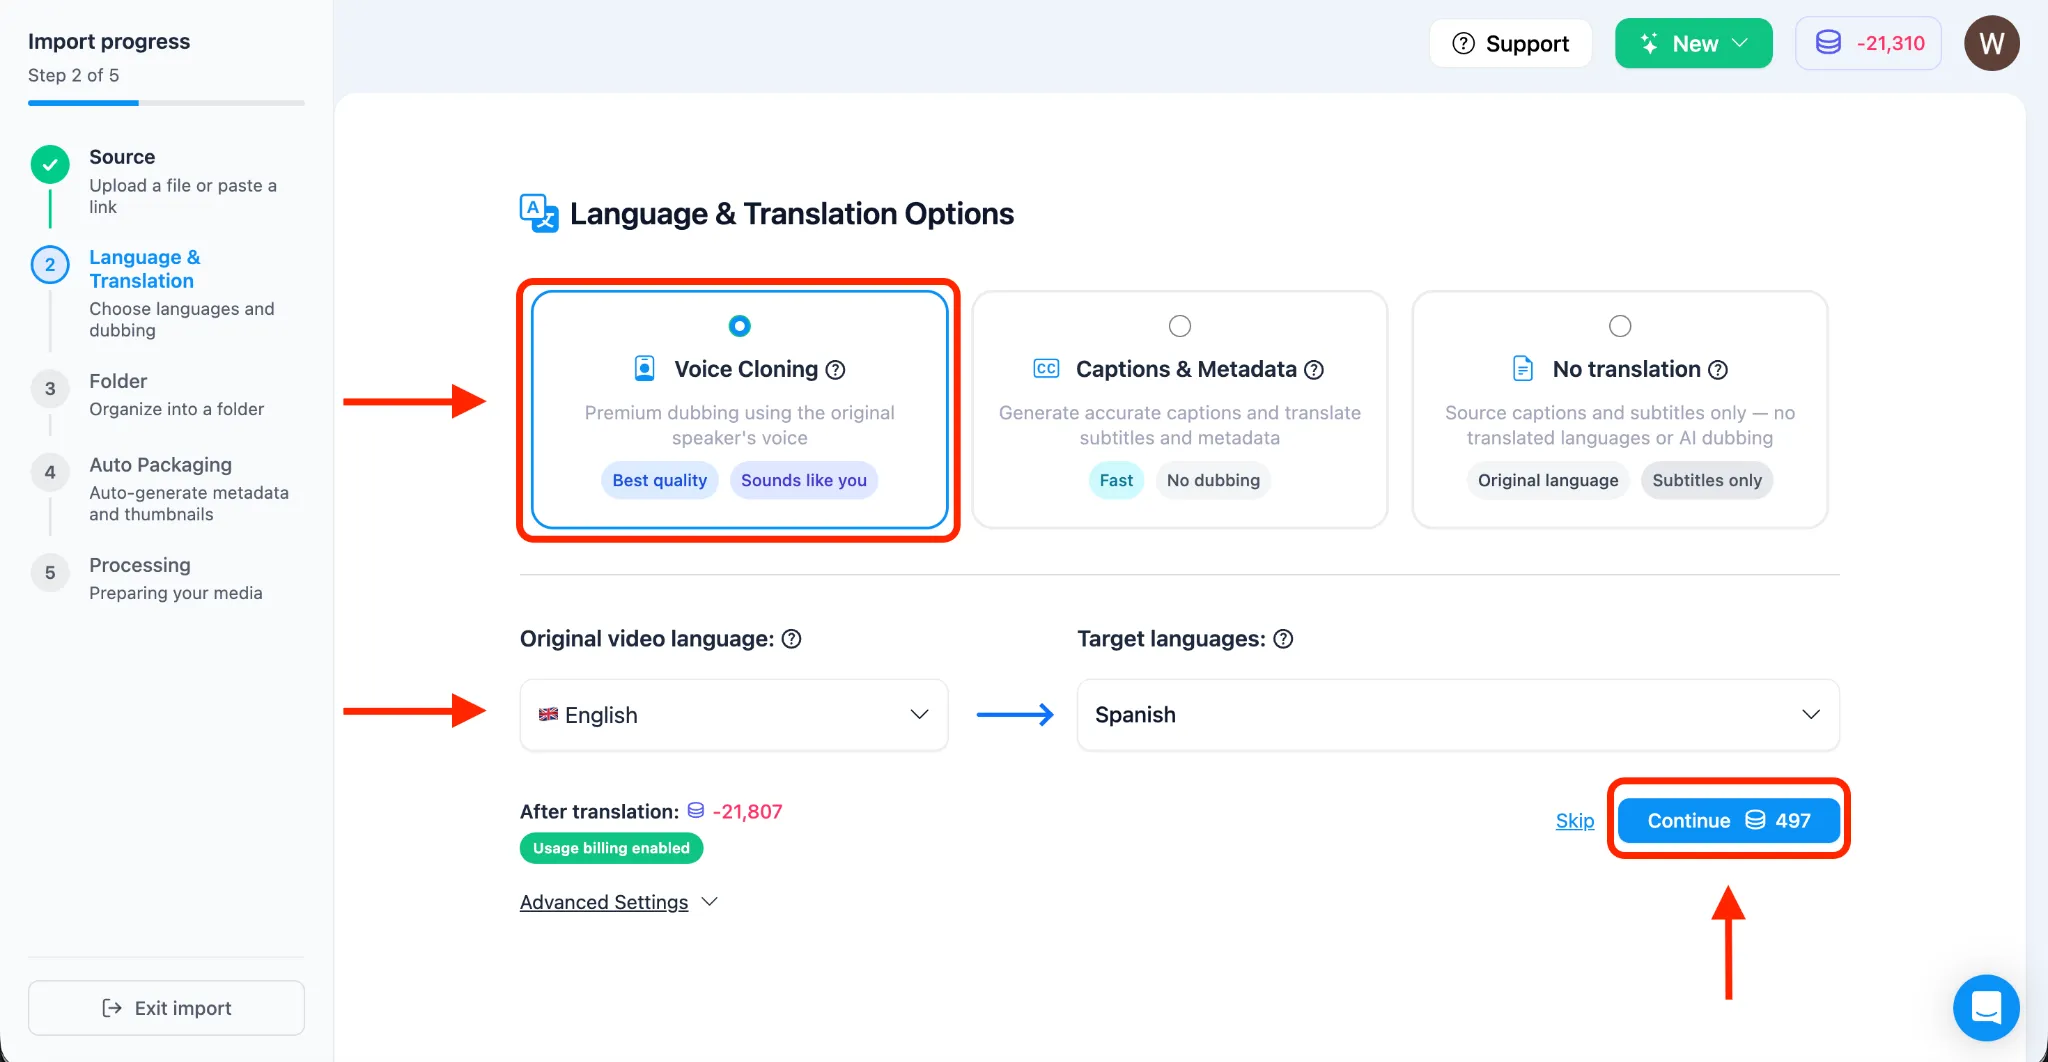
Section titled “4. Select the Voice Cloning (Auto-Dubbing) Option”- Once your video has been imported and you arrive at the Language & Translation options page, under the Language and Translations Options section, select Voice Cloning (Auto-Dubbing).
- Manually select your Original Video Language under the Target Languages section, as this will help the engine perform a better translation instead of relying on auto-detect.
- Select the languages you want to translate your video into. You can select multiple target languages to process at the same time. (For this tutorial, we will select Spanish).
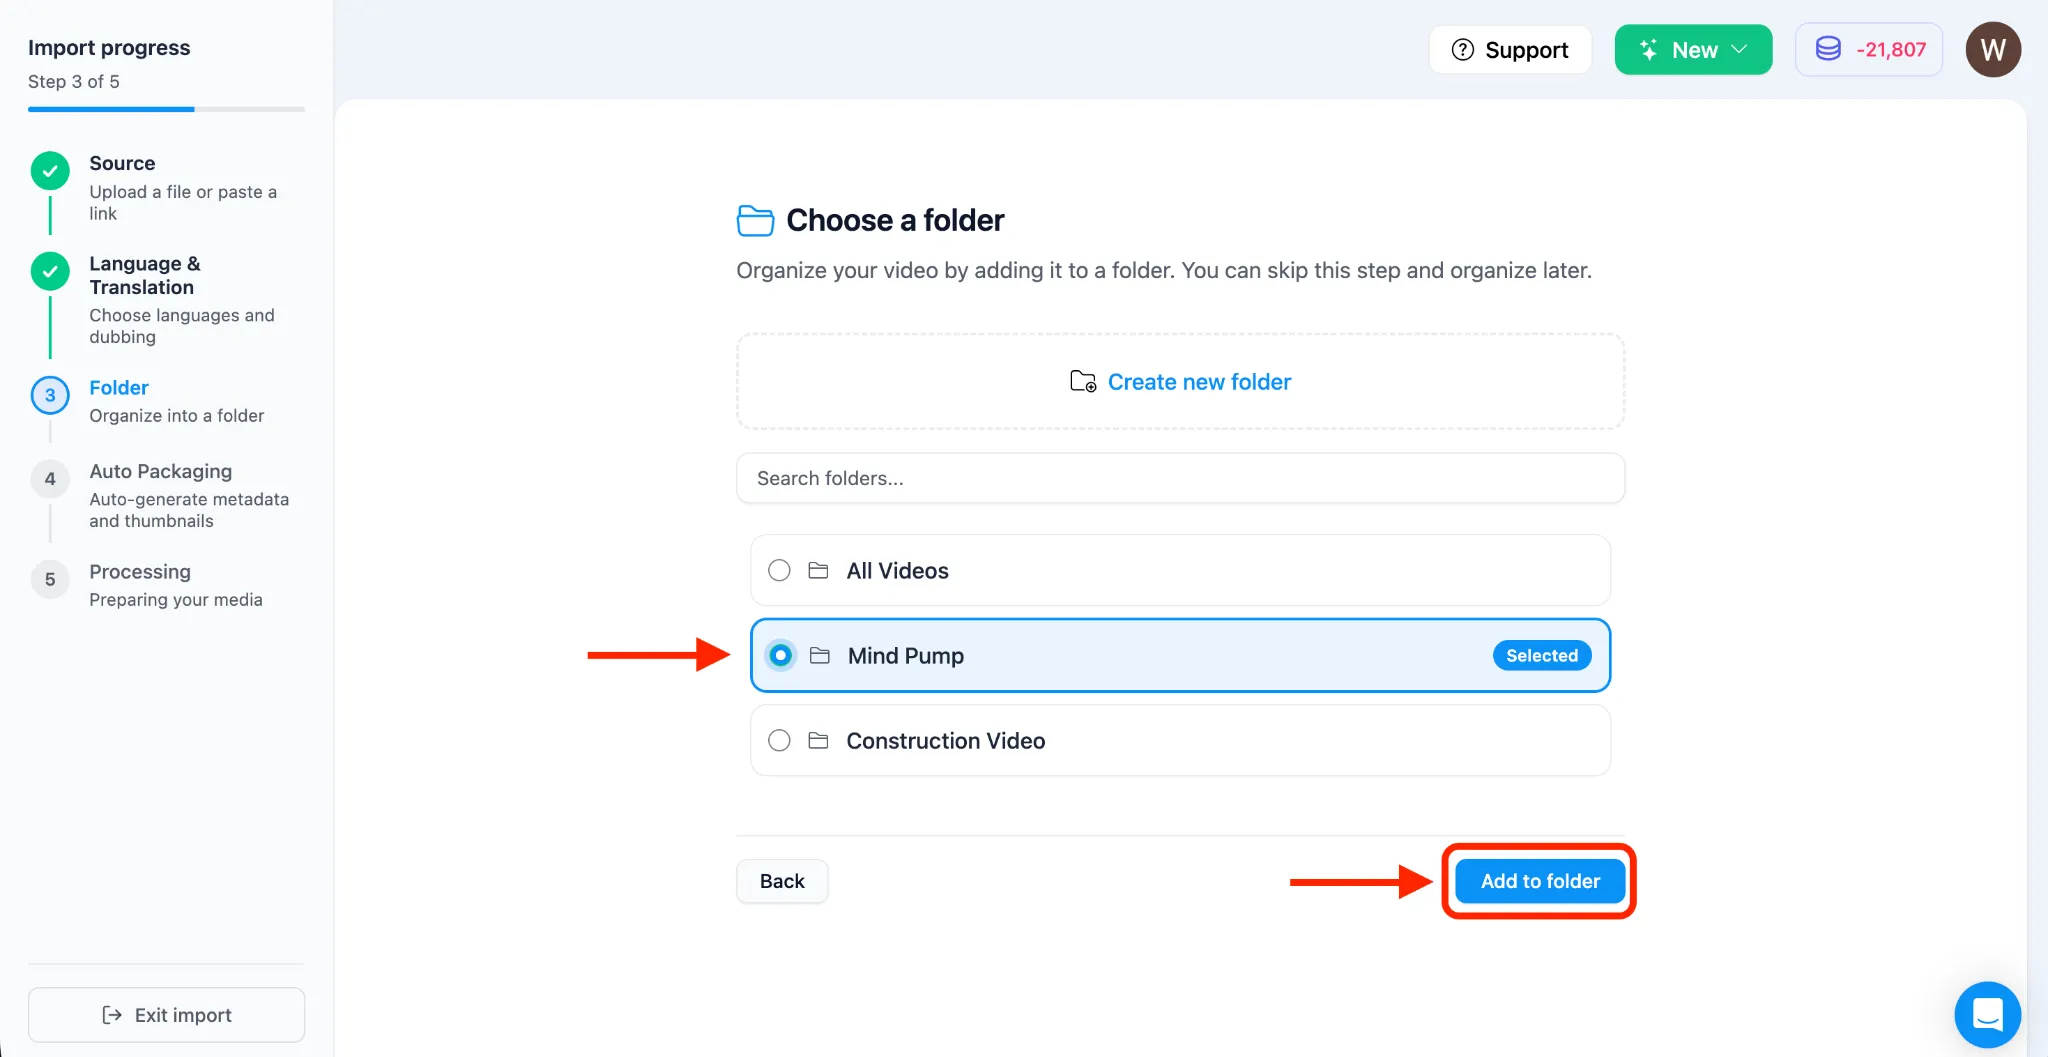
5. Select Folder to Organize Videos
Section titled “5. Select Folder to Organize Videos”- The system will ask you to choose a folder to organize your video. If you don’t have one yet, you can create one.
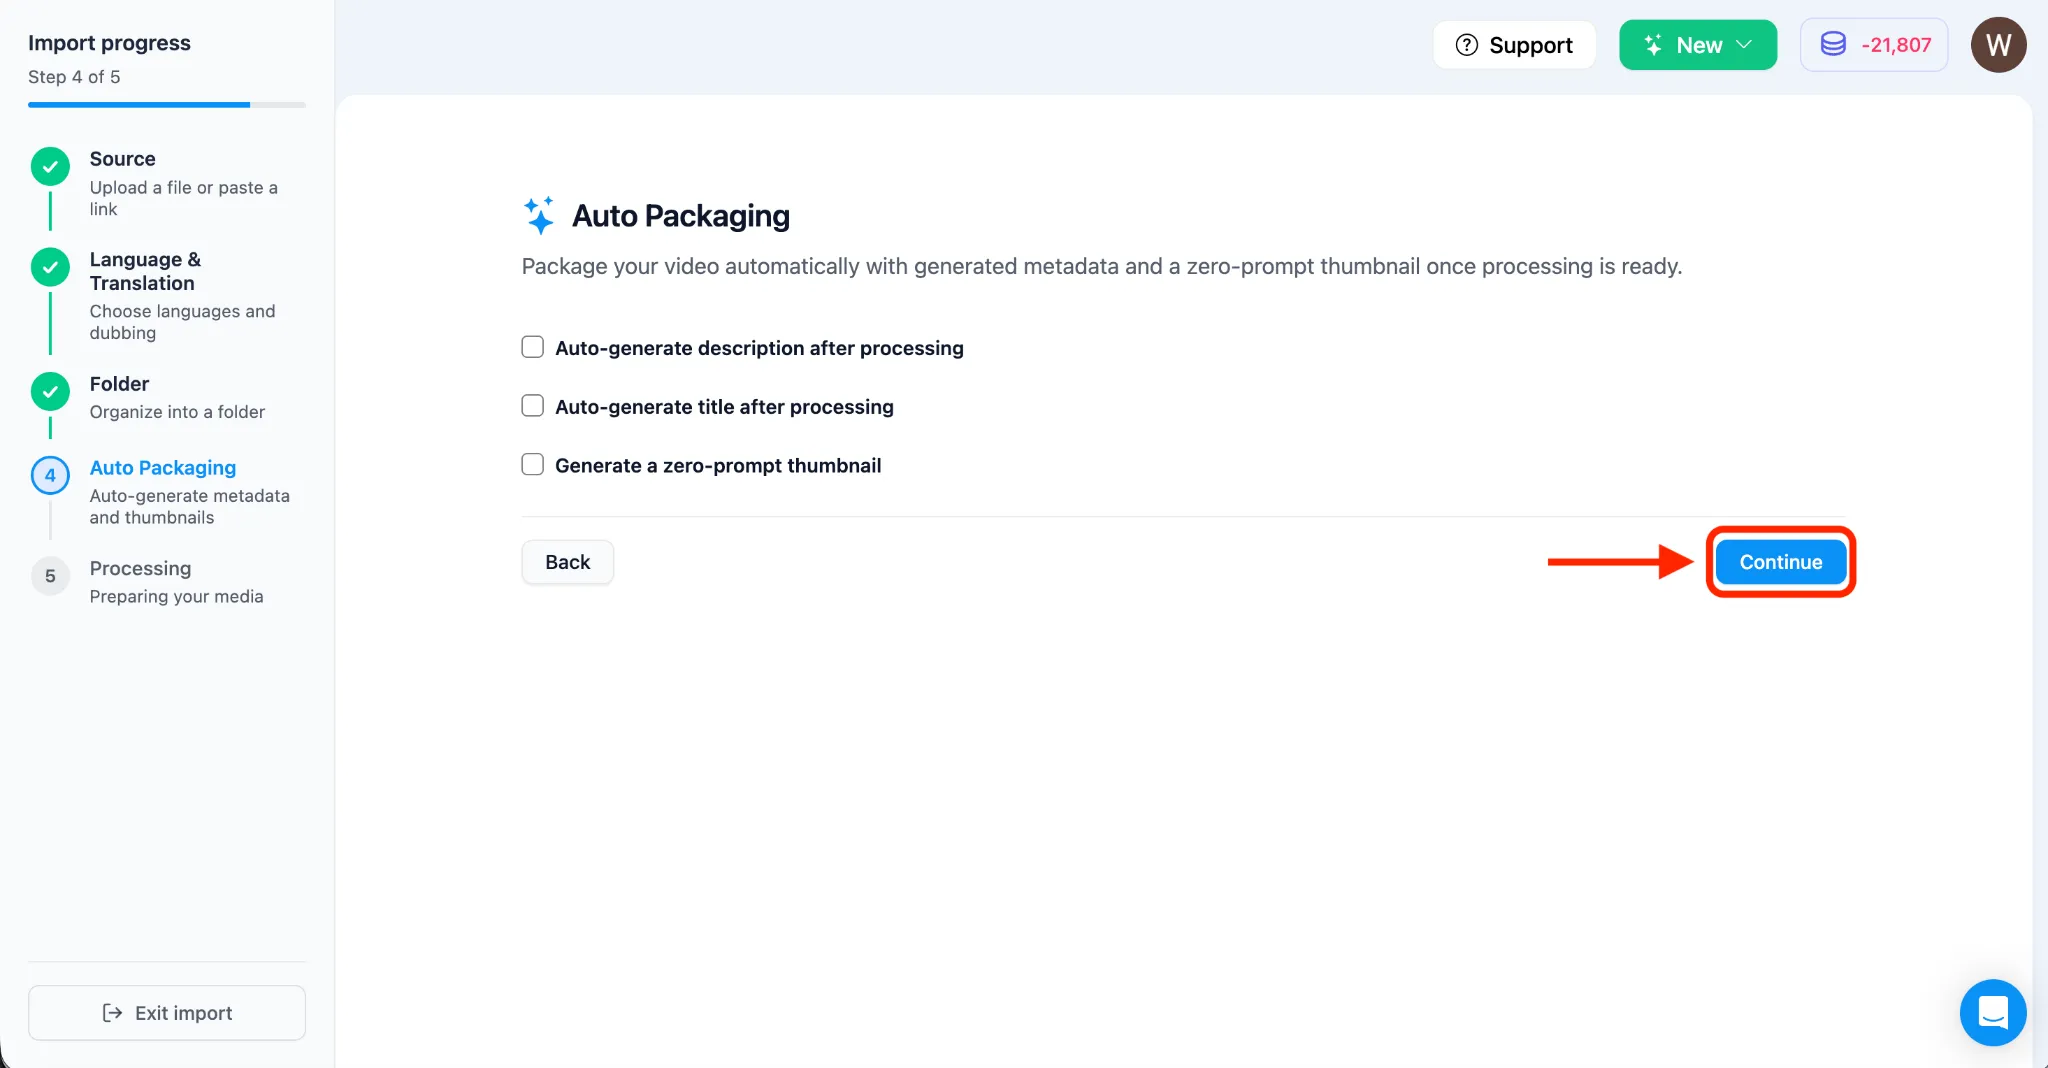
6. Autopackaging Your Video
Section titled “6. Autopackaging Your Video”- The workflow will transition to the autopackaging page where you can automatically generate metadata and a thumbnail. For this tutorial, we opted not to apply Auto Packaging. Click CONTINUE.
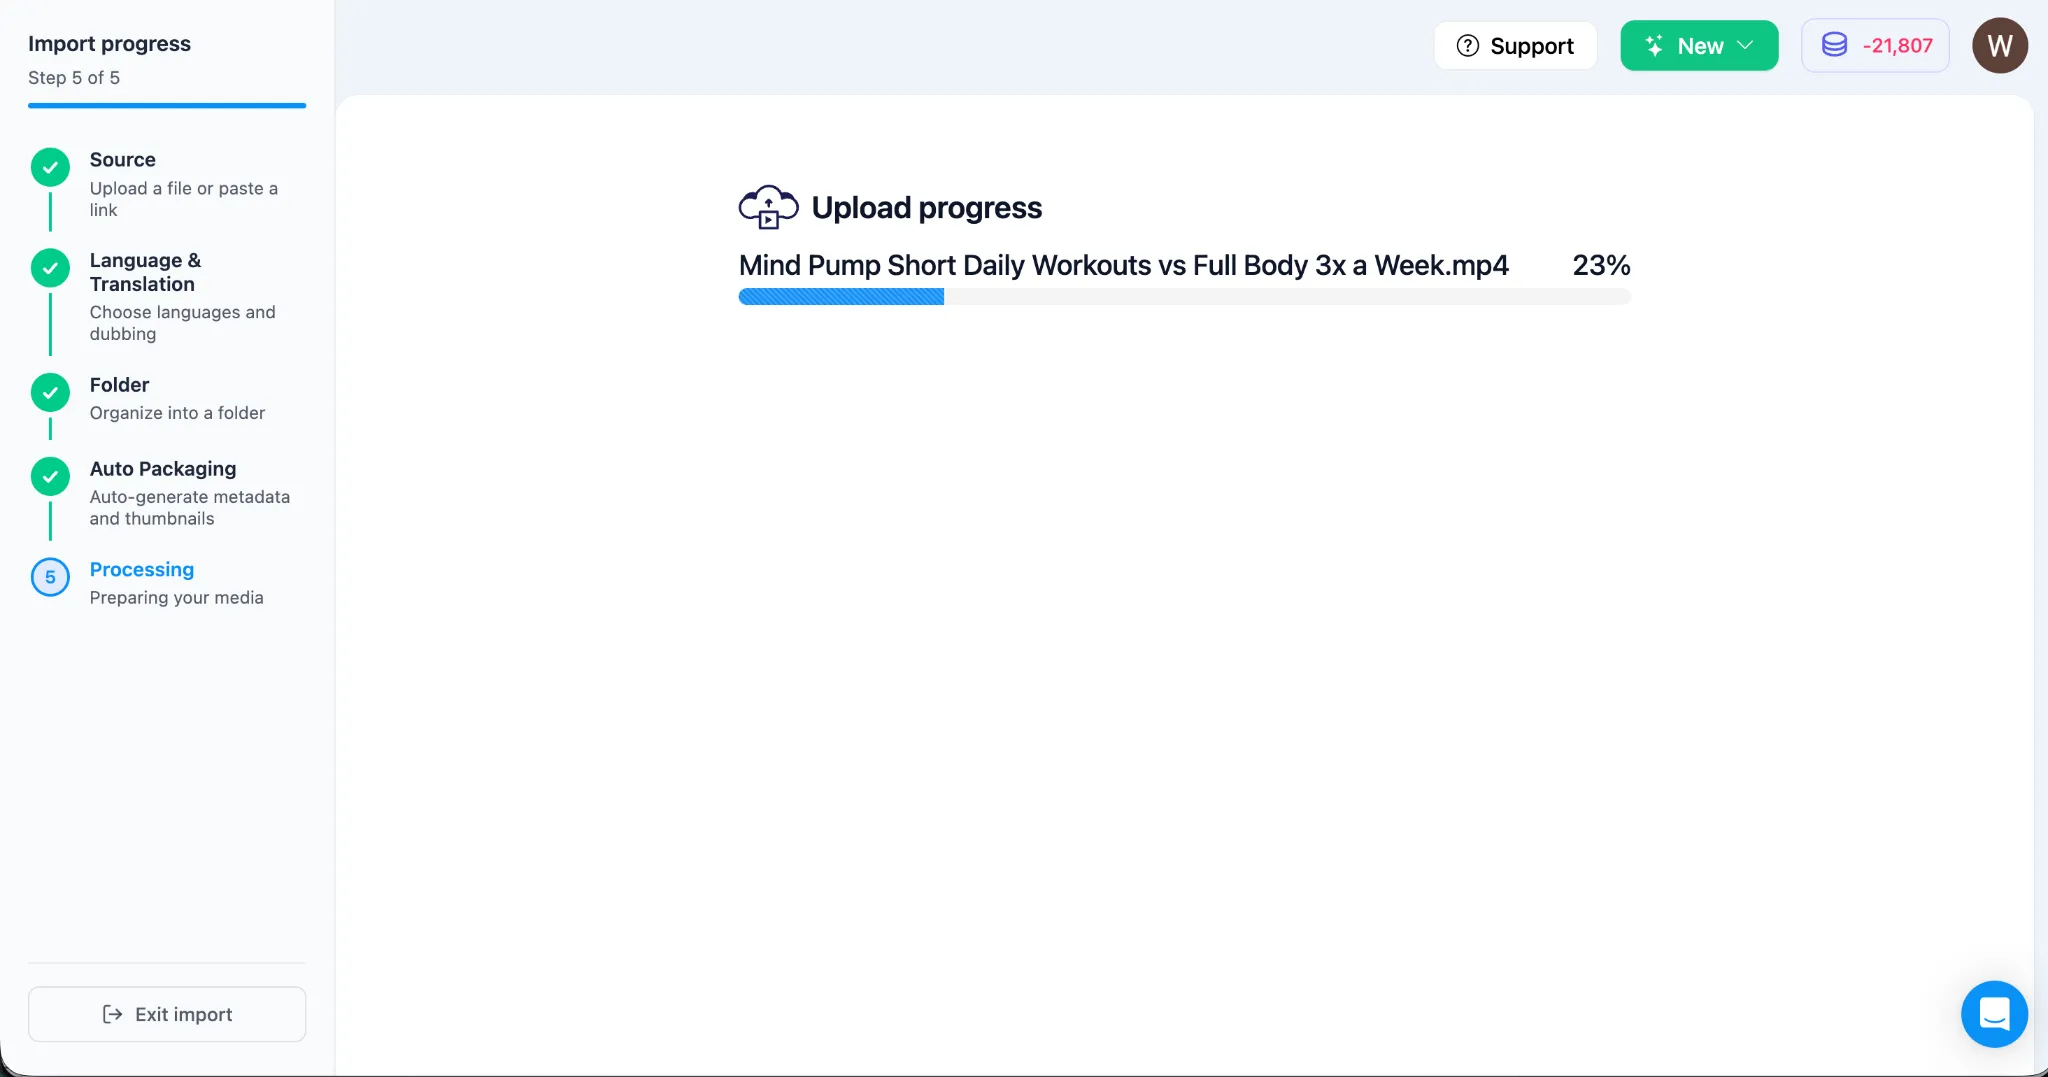
7. Monitor Upload Progress
Section titled “7. Monitor Upload Progress”- A progress bar will appear as your video file is uploaded and finalized.
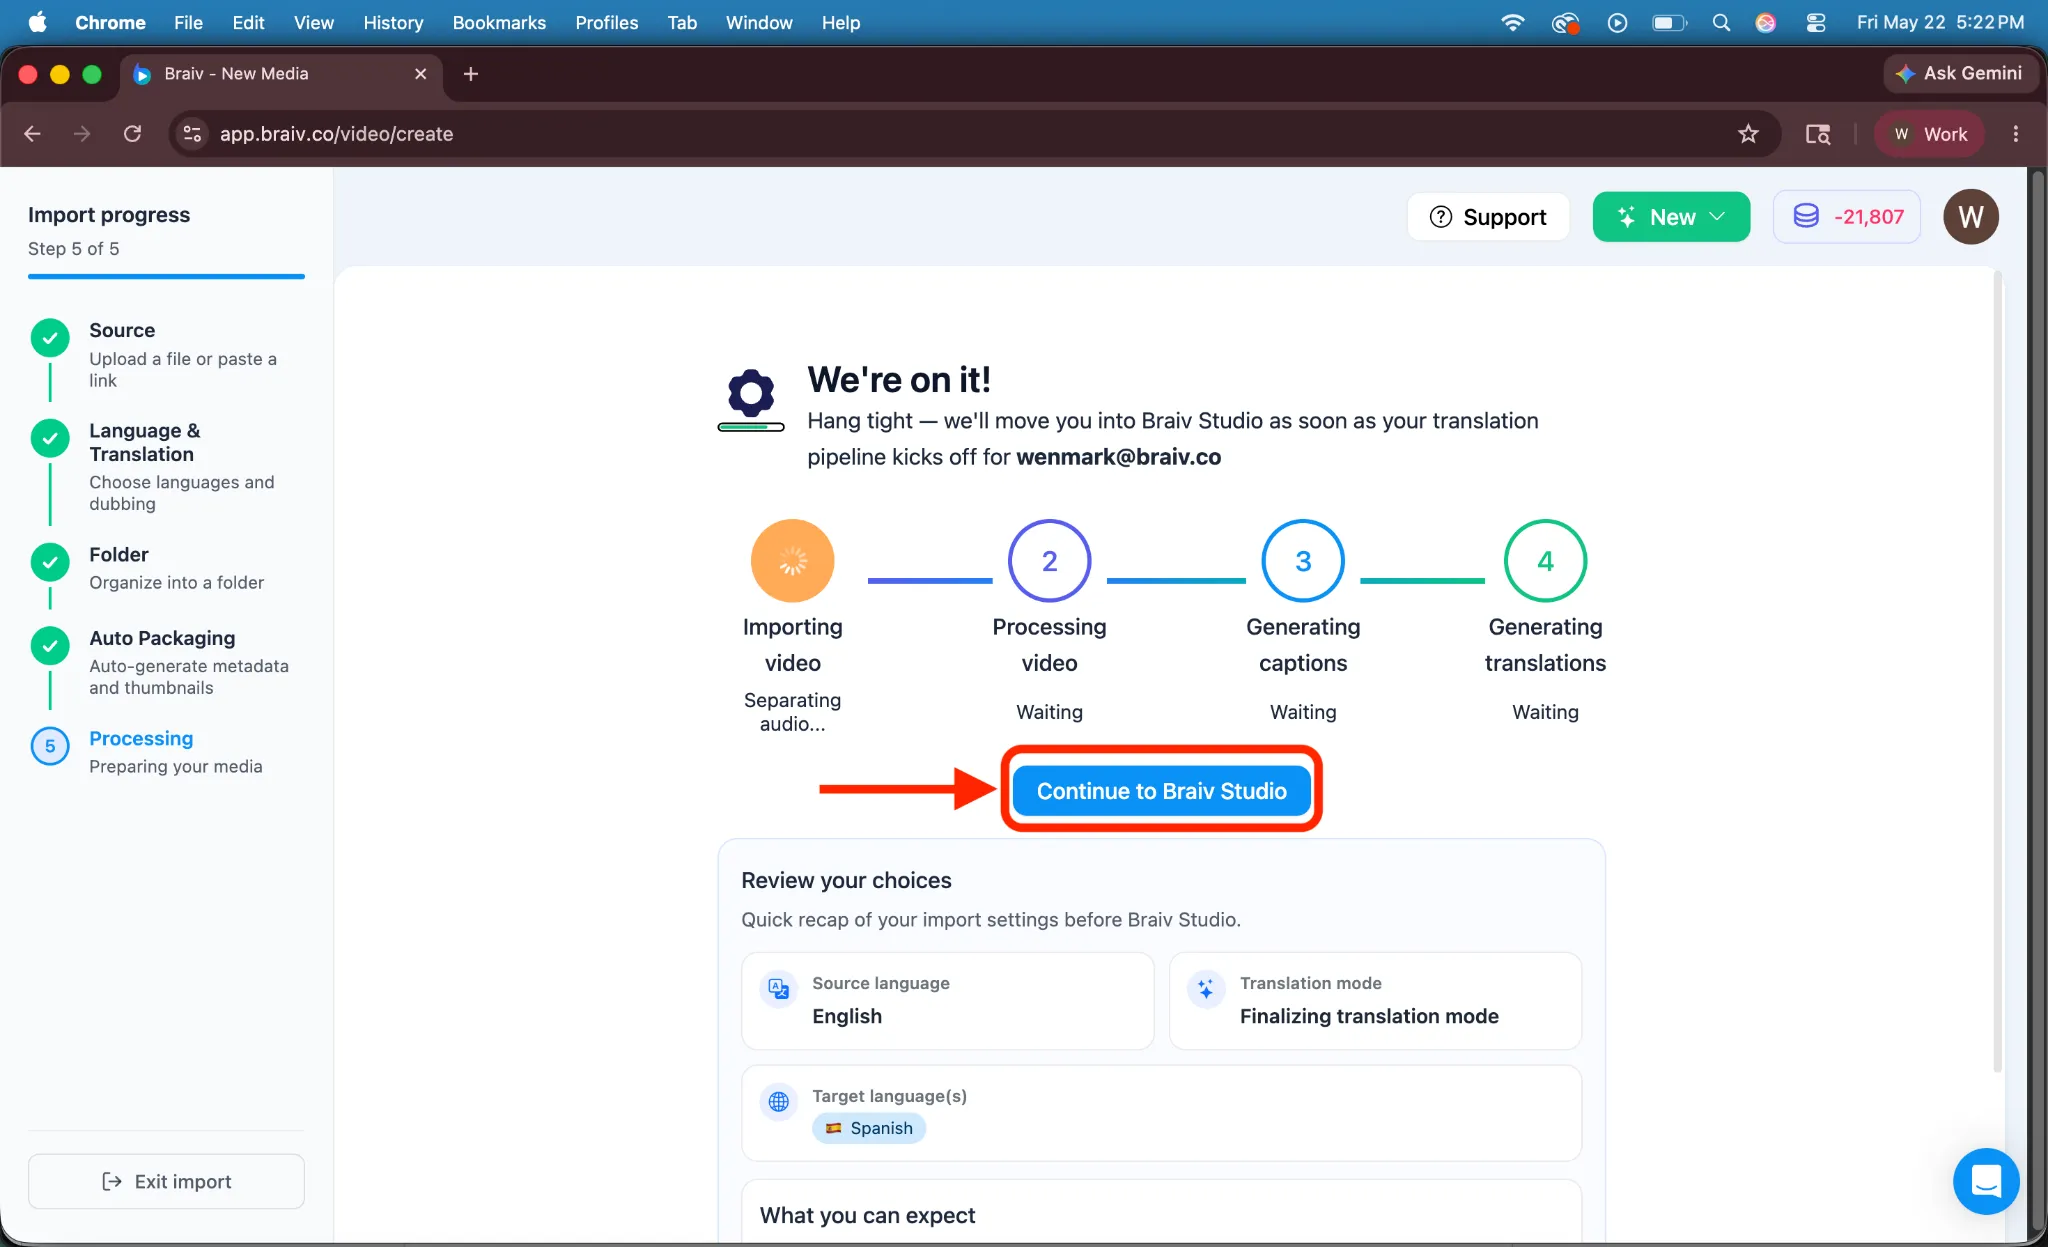
8. Review the Processing State
Section titled “8. Review the Processing State”- The Braiv engine will now begin processing your video translation, transcription, and voice cloning.
- Paid subscribers will see an option to go straight to the Braiv Studio while the system processes in the background.
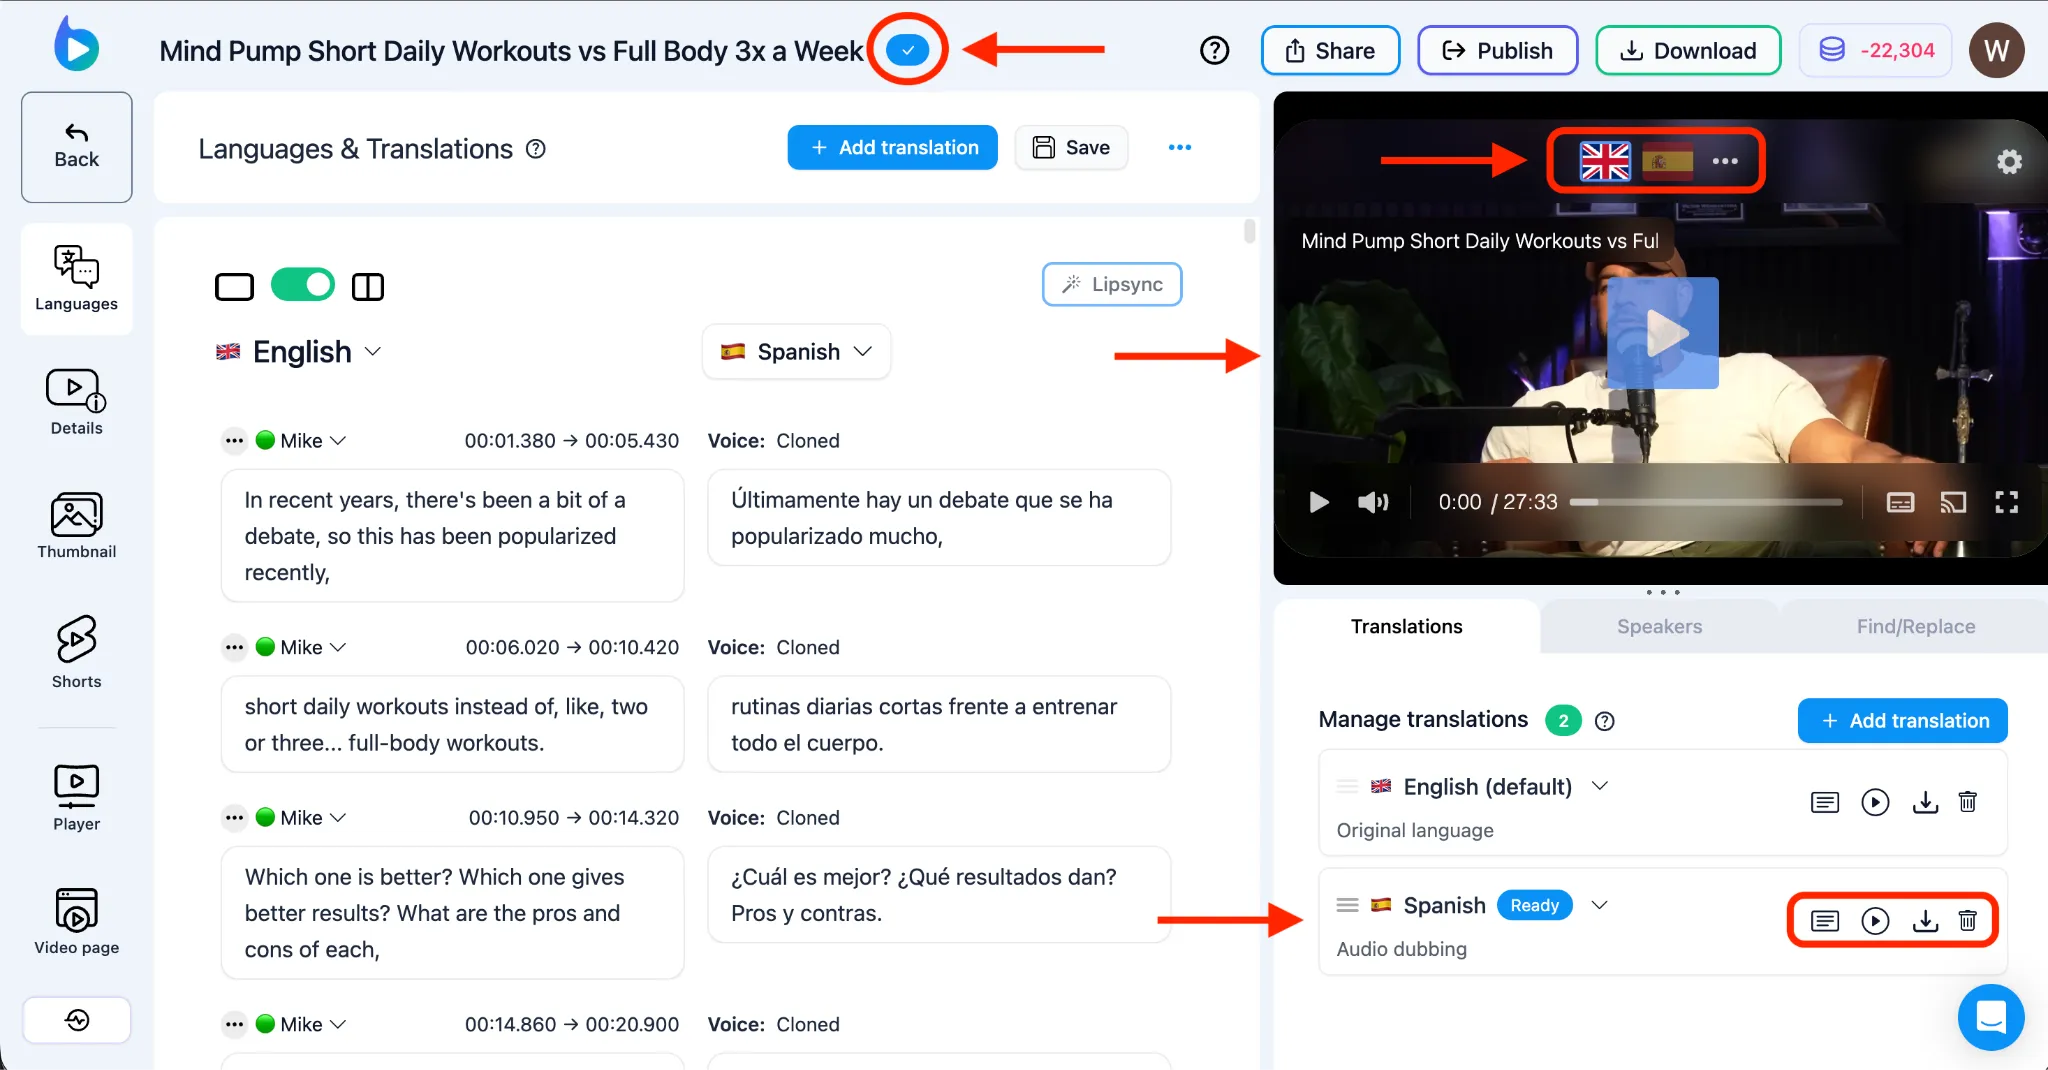
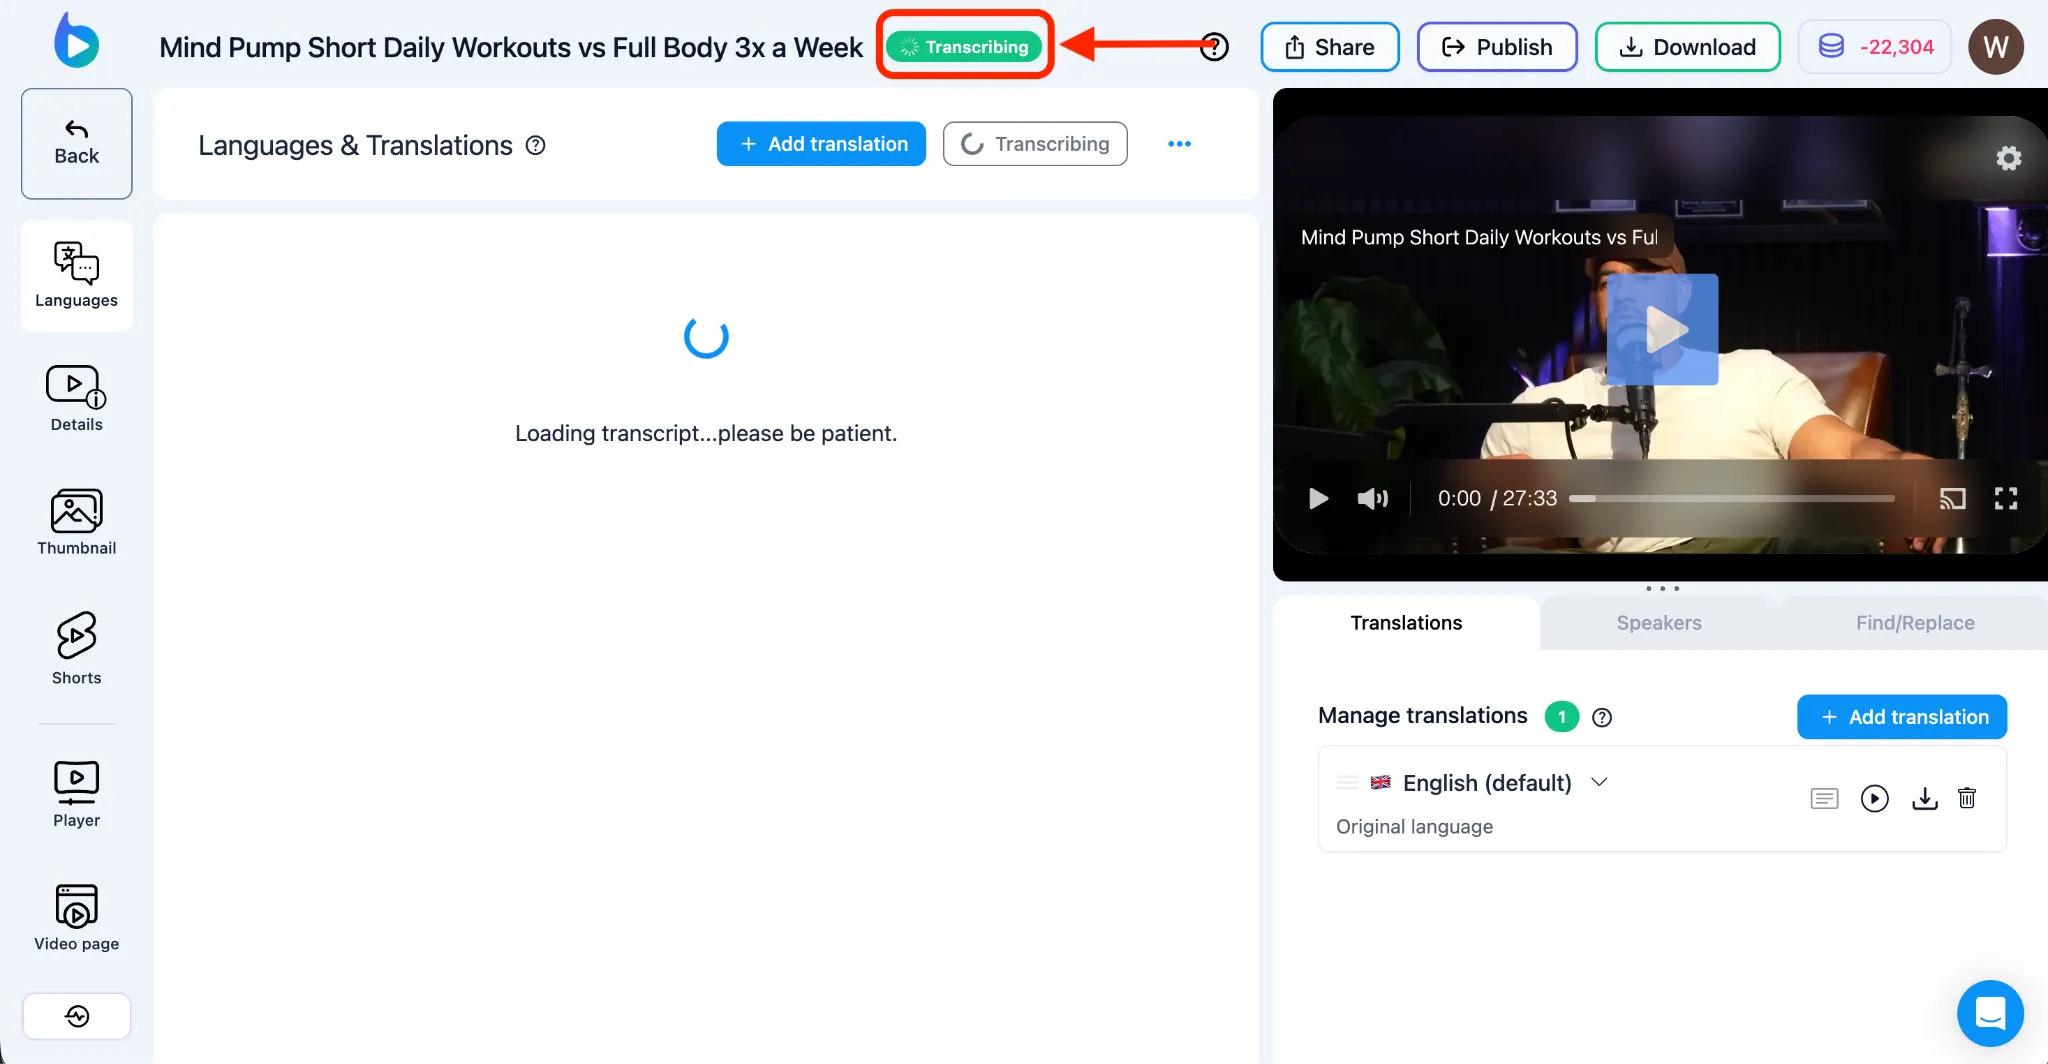
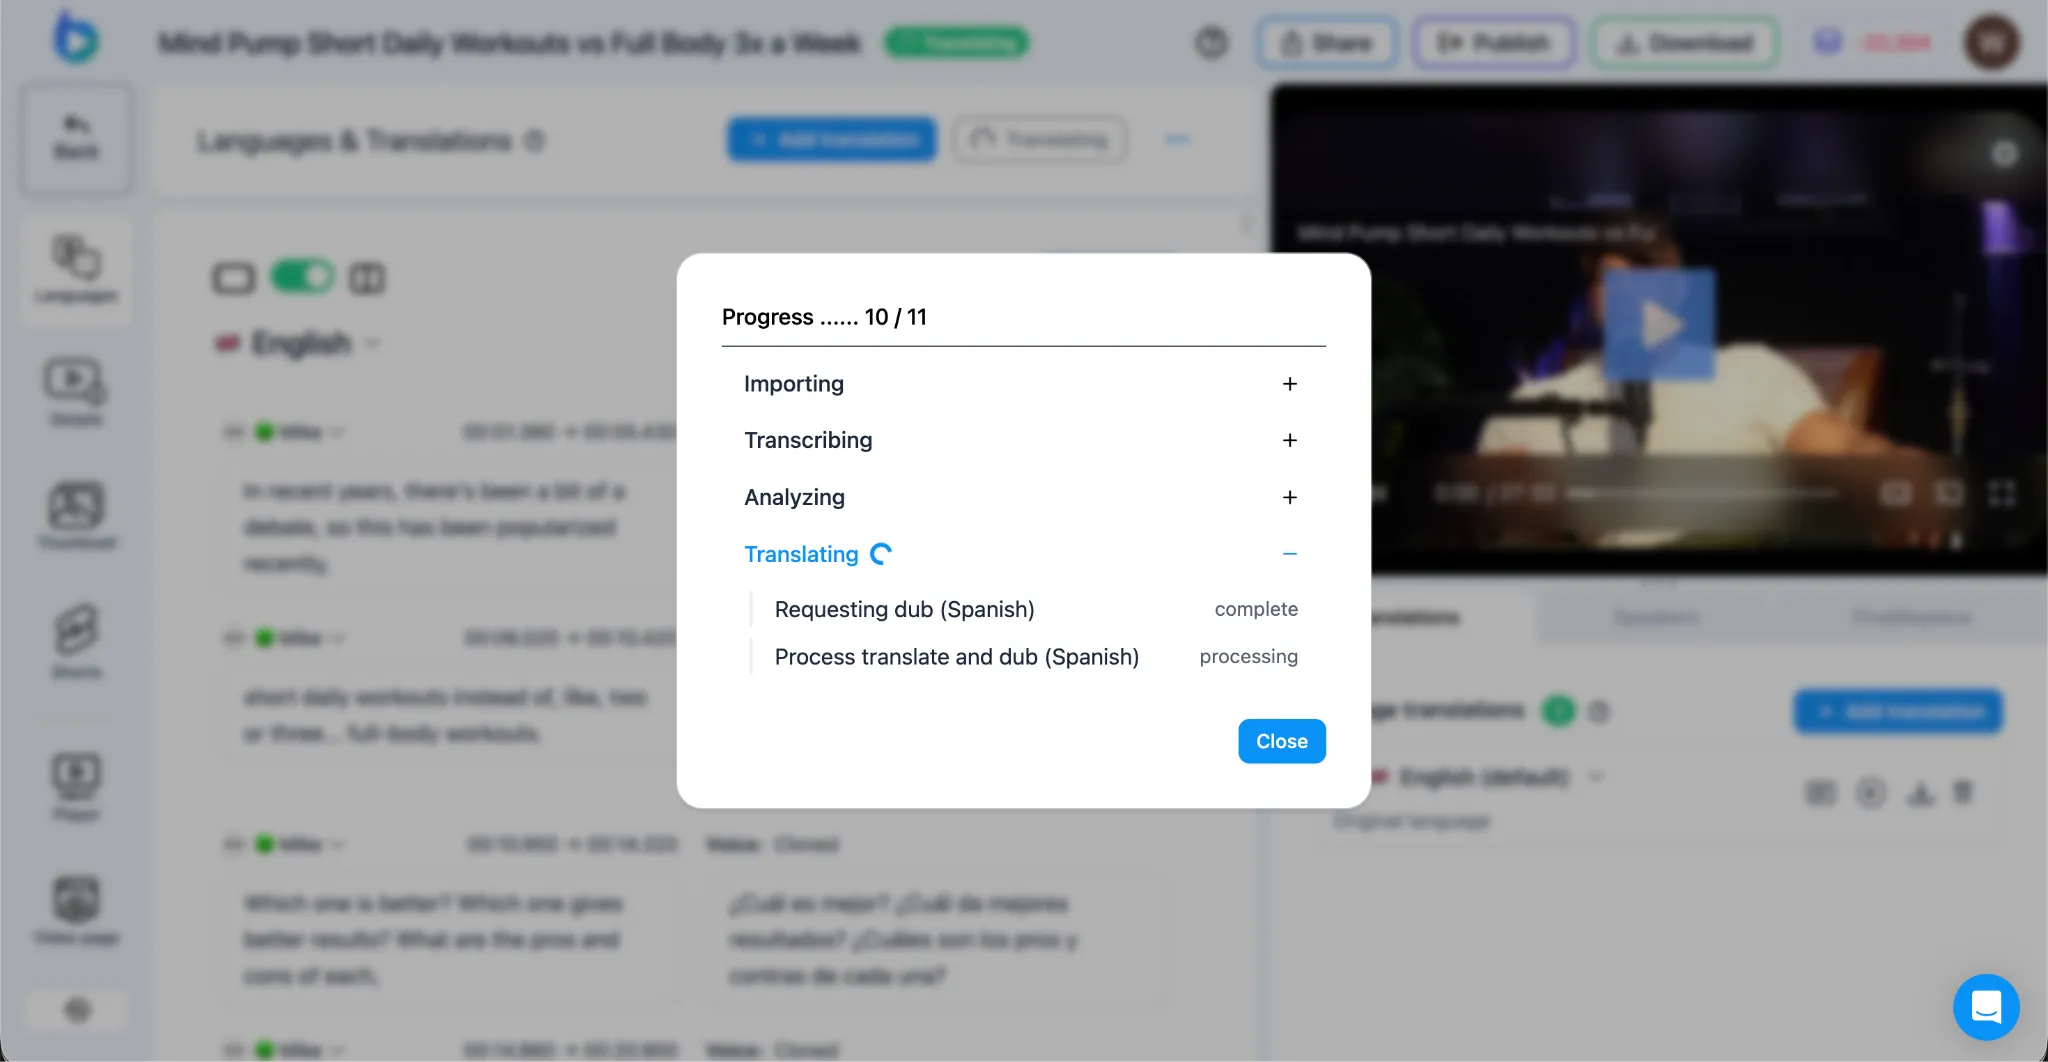
9. Access and Verify Your Cloned Dubs
Section titled “9. Access and Verify Your Cloned Dubs”- On the Languages and Translations dashboard, a “Processing” indicator will be displayed. You can click on this indicator to check the step-by-step progress.
- Once completed, a blue checkmark status indicator will appear next to your translated languages.
- You can now play your dubbed video by clicking the Play button on the Braiv Player on the right side. You can choose the language by selecting the flag that represents the language, or access the lower-right section to download specific translated audio assets or the fully localized video!