How to Organize Your Videos with Folders
Keeping your workspace organized is easy with Braiv’s Folder system. Whether you are managing videos by client, by language, or by project phase, you can quickly create folders and move your videos between them.
Here is the exact step-by-step process for creating a new folder and moving a video into it.
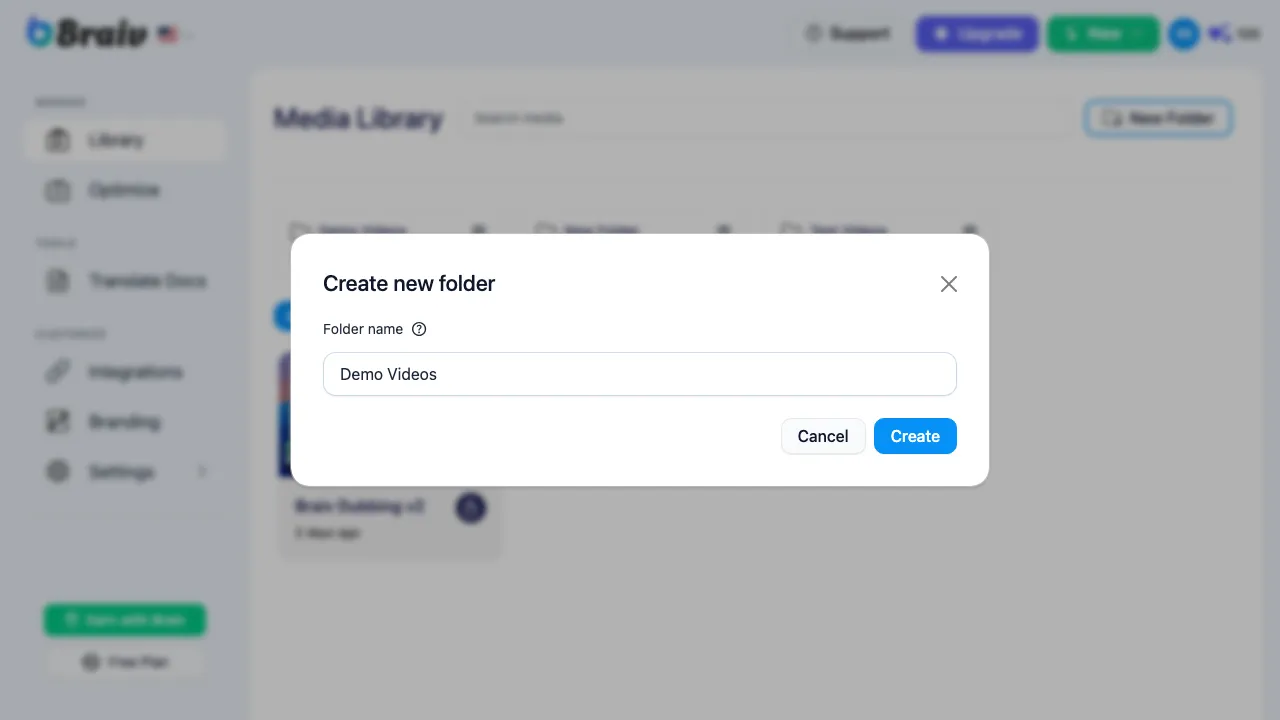
Step 1: Create a New Folder
Section titled “Step 1: Create a New Folder”- From your main Braiv Dashboard, locate and click the New Folder button in the top right.
- A modal will pop up. Type the desired name for your folder (e.g., “Demo Videos”).
- Click the Create button.
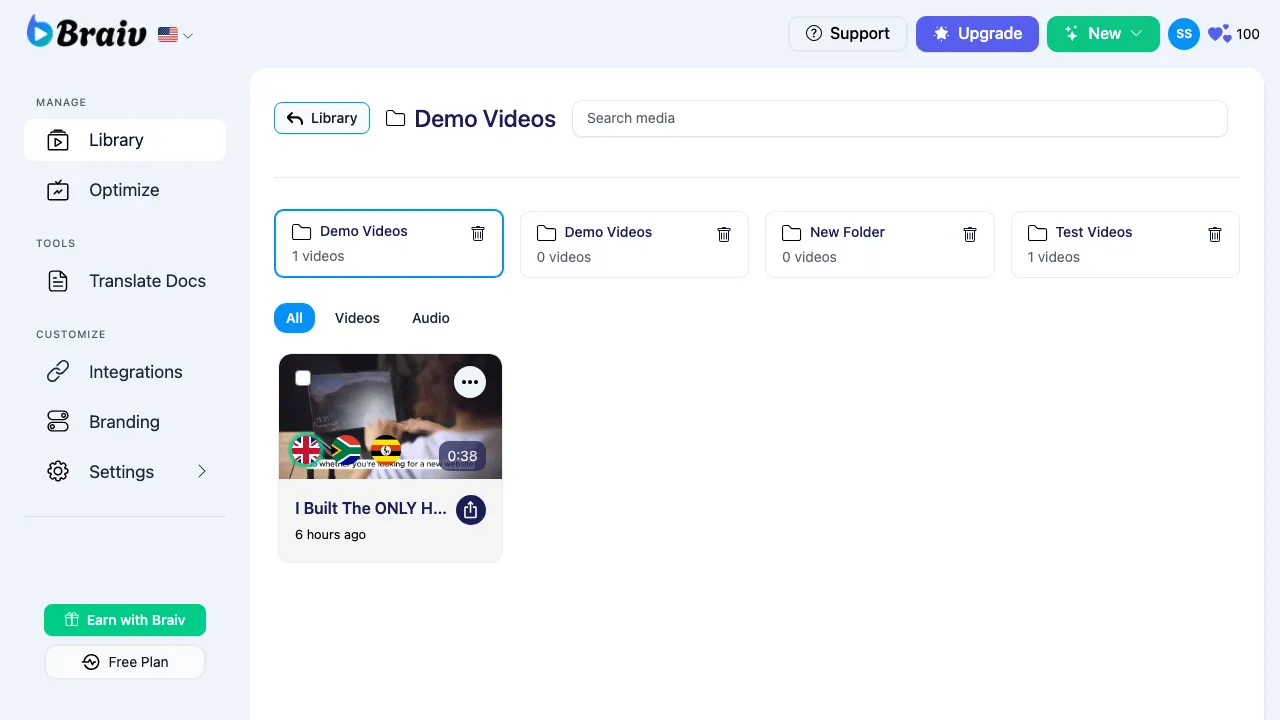
Step 2: Locate the Video to Move
Section titled “Step 2: Locate the Video to Move”Navigate to the video you want to move. This could be in your main library or currently sitting inside another folder (like “Test Videos”).
Step 3: Open the Video Options Menu
Section titled “Step 3: Open the Video Options Menu”Hover over the video card. In the top right corner of the video thumbnail, click the three-dot ellipse menu icon to open the options dropdown.
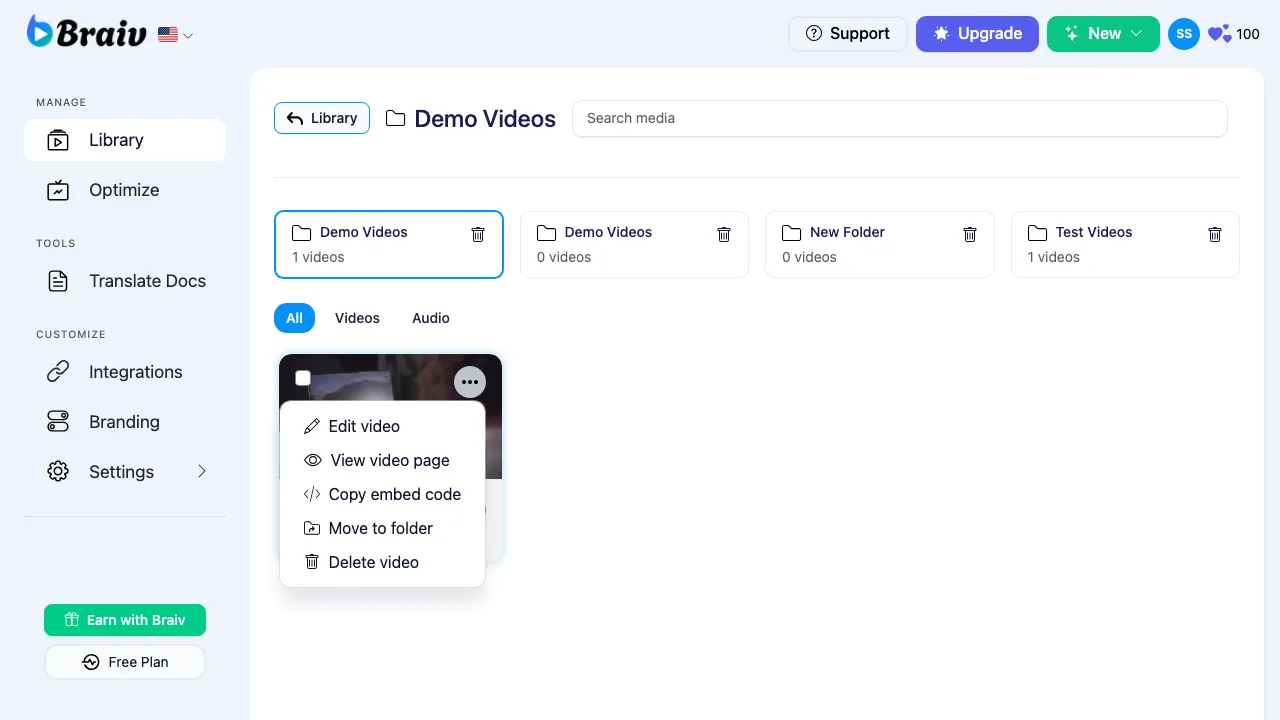
Step 4: Select “Move to folder”
Section titled “Step 4: Select “Move to folder””From the dropdown menu, select the Move to folder option.
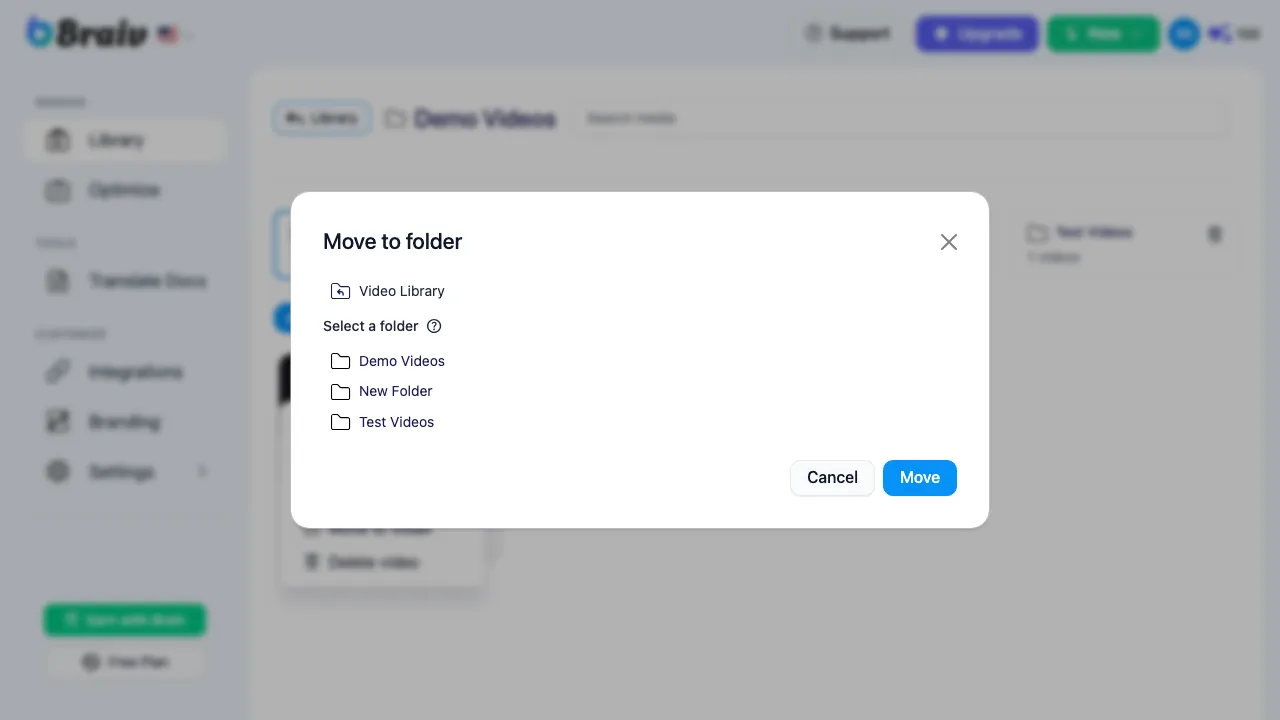
Step 5: Choose the Destination Folder
Section titled “Step 5: Choose the Destination Folder”- A new “Move to folder” modal will appear on screen.
- Scroll through the list and select the destination folder you just created (e.g., “Demo Videos”).
- Click the blue Move confirmation button.

Step 6: Verify the Move
Section titled “Step 6: Verify the Move”Navigate back to your main Dashboard and click into your newly created folder. You should now see your video successfully moved to its new location!
